Kongdeyuan (talk | contribs) m (Update translations) |
Kongdeyuan (talk | contribs) m (Update translations) |
||
| Line 33: | Line 33: | ||
{{admon/note|注意 | 除管理员组外,其他人无法访问电话号码和地址信息。 请参阅 https://fedoraproject.org/wiki/Legal:PrivacyPolicy 上的Fedora隐私政策。 其他任何成员都可以通过访问用户的视图页面显示其他信息。}} | {{admon/note|注意 | 除管理员组外,其他人无法访问电话号码和地址信息。 请参阅 https://fedoraproject.org/wiki/Legal:PrivacyPolicy 上的Fedora隐私政策。 其他任何成员都可以通过访问用户的视图页面显示其他信息。}} | ||
{{admon/ | {{admon/tip|有关FAS的更多信息| 有关Fedora帐户系统的更多详细信息,请参阅 https://fedoraproject.org/wiki/Account_System 。}} | ||
===签署CLA === | ===签署CLA === | ||
Revision as of 08:04, 26 February 2019
Fedora 本地化工作指南(新的)
愿景
这个页面,描述了如何加入L10N本地化团队。作为一个新的翻译者,应该如何在Zanta上翻译。
如何成为一个Fedora翻译者
L10n项目显然不仅仅是为了翻译。不过,翻译却不妨成为一个不错的门槛来迈入本地化团队,下面是使您成为翻译者的一些基本步骤:
- 创建一个FAS账户
- 加入邮件列表
- 介绍你自己(您可以在您加入的邮件列表中做这个,并且创建Wiki中的User页面)
- 使用您的FAS账户登录Zanta
- 寻找适合于您的语言团队并加入
你的自我介绍很重要。 它有机会提高你的操作权限。 你可能还想创建一个Bugzilla帐户来处理用户反映的错误。
创建一个FAS账户
- 打开 https://admin.fedoraproject.org/accounts 并点击“New Account(新建账号)”链接。
- 填写所有项,然后单击“Sign up(注册)”。 密码将通过电子邮件发送给你,你可以稍后更改密码。
- 现在再次访问 https://admin.fedoraproject.org/accounts 并用你的密码登录。
- 帐户系统会提醒你CLA未完成。
签署CLA
要开始翻译前,你必须完成贡献者许可协议或CLA。
- 访问 https://admin.fedoraproject.org/accounts 并用你在上一过程中获得的用户名和密码登录你的帐户。
- 在欢迎页面中,单击完成CLA或转到https://admin.fedoraproject.org/accounts/user/edit。
- 如果你尚未提供电话号码和地址的信息,将出现编辑帐户(user_name)页面,你需要填写每一项。否则将显示"Fedora Contributor License Agreement"页面。仔细阅读协议,如果你愿意,请点击我同意。
- 现在点击“保存”! 在页面底部保存你的信息。
- 出现用户视图页面,CLA项:显示为“CLA 已验证”。
签署CLA
要开始翻译,你必须完成贡献者许可协议或CLA。
#访问https://admin.fedoraproject.org/accounts并使用您在上一过程中获得的用户名和密码登录您的帐户。 #在欢迎页面中,单击完成CLA或转到https://admin.fedoraproject.org/accounts/user/edit。 #如果尚未提供电话号码和邮政地址的信息,将出现编辑帐户(user_name)页面,您需要填写每个页面。否则将显示Fedora Contributor License Agreement页面。仔细阅读协议,如果您愿意,请点击我同意。 #现在点击保存!位于此页面底部以保存您的信息。 #出现用户视图页面,并将CLA:字段显示为CLA Done。
Template:Admon / note Template:Admon / tip
加入邮件列表
Main L10n mailing list
- Visit trans mailing list subscribe page and subscribe it.
- You won't be able to send message to the list until you are approved by the admin of the mailing list. You will receive a confirmation email which contains a link to confirm your subscription. Click the link to confirm your subscription.
Your team mailing list
- Visit https://fedoraproject.org/wiki/L10N/Teams and find your language team(s)
- Subscribe the mailing list(s) for your language(s)
介绍你自己
- Create a personal page at https://fedoraproject.org/wiki/User:Username.
- Make a short self-introduction to the mailing lists you have subscribed. If you don't know what to introduce, here is a template: https://fedoraproject.org/wiki/L10N_Self_introduction.
The above two steps are very useful for Fedora contributors get to know and contact each other. The second step also helps your language coordinator to identify you and approve you as a translator of the team.
使用您的FAS账户登录Zanta
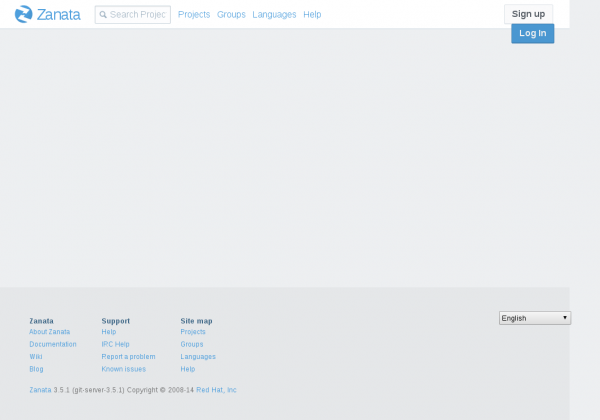
- Open https://fedora.zanata.org/ and click the blue 'Log In' button on the top-right of the page.
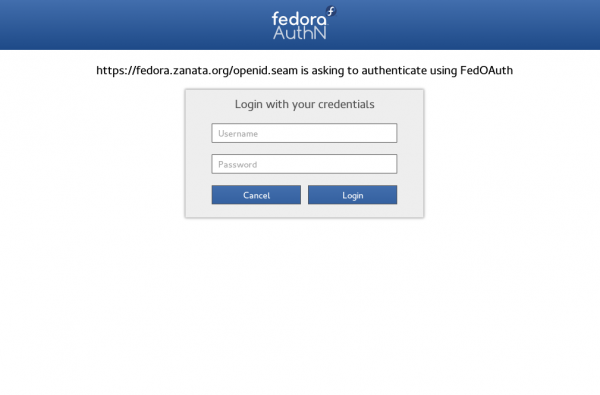
- Then it will guides you to FedOAuth page in which you can Login with your FAS account and password you have registered in last section.
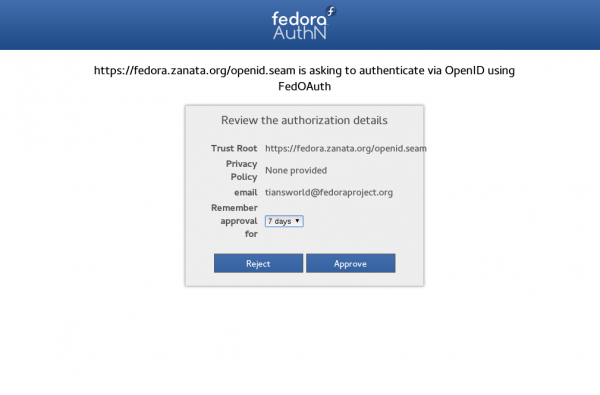
- Then you will be directed to a authentication page, click 'Approve'.
- A 'new user' page will be opened.
You should enter your full name, username(FAS username) and your email address. Note: Please use your true email address but not your Fedora project alias(username@fedoraproject.org). When you finish them, click the Save button. A activation email will be sent immediately to your email address. Please find the mail in your inbox and open the activation link that is provided in the mail. Then login with your FAS username and password. You won't need to follow this step again when you login next time. It's only necessary for new user login.
寻找适合于您的语言团队并加入
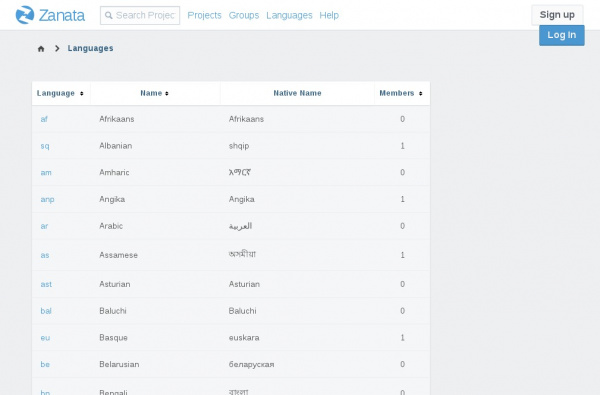
- Click Languages at the top of https://fedora.zanata.org, then you will see all the available languages.
- Find the language you want to translate and click the language code.
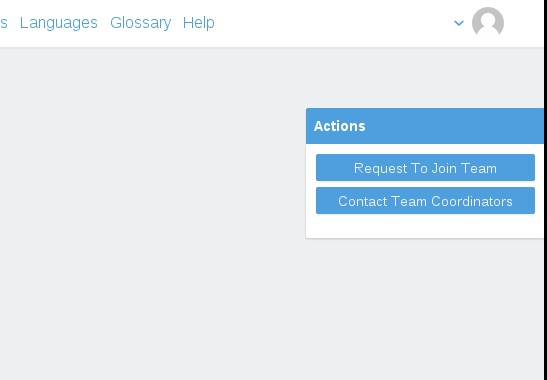
- Click the blue button Request To Join Team on the left side of the page.
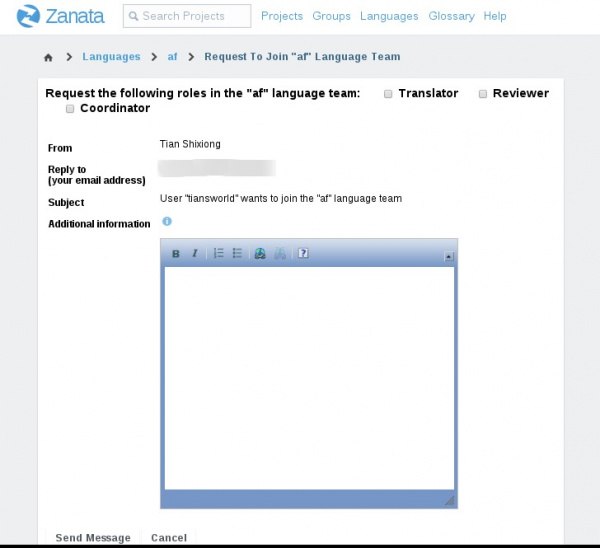
- You should choose the role(s) you want to be and click Send Message. Additional message is optional. Here I use Afrikaans as example in screenshot below.
- The team coordinator will receive a email notification about your request. You will be the team member as long as he/she approves your request. However, the coordinator may not approve each of your role request. In other words, if you request to be Translator, Reviewer and Coordinator, he/she may only approve you as a translator.
Translating
Translating online on Zanata
Finding your project
There are three ways of finding your translation files on Zanata:
Option 1 : Project search
If you know the title of your translation project, you can look for it thanks to the project search box
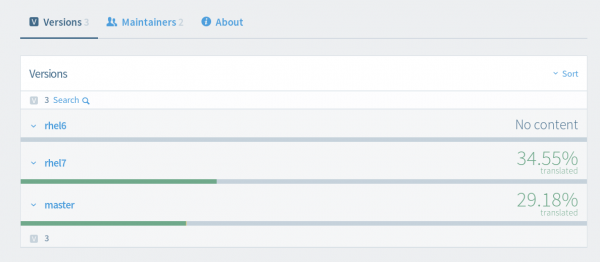
then select the appropriate project to see the available versions for translation.
Option 2 : Projects Page
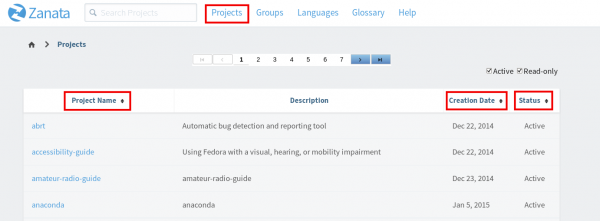
Click on the “Projects” link located at the top of the page to access all projects on the Projects page. The table of projects can be sorted by name, creation date or current activity status by clicking the arrows in the table headings.
Click the name of a project to see the available versions for translation.
Option 3 : User Dashboard
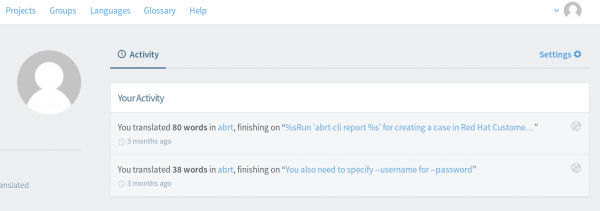
Your translation project can also be accessed from the User Dashboard.
The section “Activity” lists all your latest translations. If looking for a recently translated project, look for the name of the project through that list of messages. You can access a string, a document, a version or a whole project by clicking the relevant links in the message.
Translating
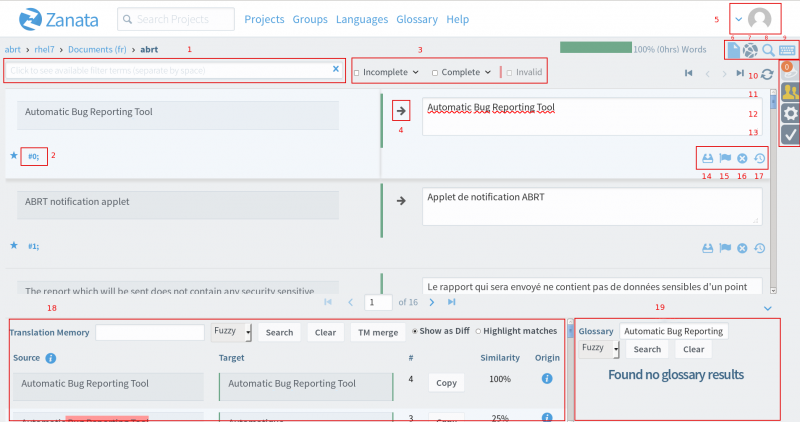
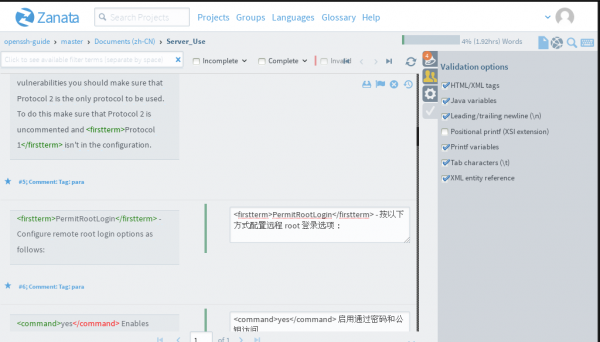
After finding and selecting your project, the following editor will open:
1. Search
Search strings by either typing a term directly in the box or by selecting a filter and entering a value by which you wish to filter the strings. For example, if you wish to display only the strings modified by yourself, select "last-modified-by" and enter your username.
2. String details
Allows you to view the details of a specific source text, including comments.
3. Filtering
The strings can be filtered by state: Incomplete, Complete and Invalid (containing a warning or error). For example, to display all Untranslated (empty), Fuzzy (draft) and Rejected strings, check the Incomplete box. To display only a specific type of Incomplete strings, check the corresponding box, e.g. Fuzzy.
4. Copy message from source language
This function is useful when the source text contains tags, numbers or product names that should remain the same in the target language.
5. Profile icon
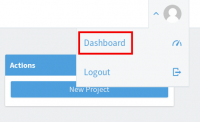
Click on this icon to log out or access your dashboard. The top right of the dashboard displays the number of words/messages/documents translated for the current day/week/month. The bottom part of the dashboard displays your Activity, i.e when and in which file you translated last
6. Document list
Click to go back to the list of documents for this project
7. Editor
This button allows you to revert to the editor from any other page you are in, e.g. from the Project-wide Search & Replace page.
8. Project-wide Search & Replace
Use this option to search and replace specific terms or phrases throughout the whole file. To do so: Enter a term in the search box, set the search filter “search target”, and check the “Case sensitive” case if applicable. In the second text box, enter the term you would like to use instead. Then either check “Select all” or select the string(s) you would like to apply this change to and click “Replace” to apply your changes.
9. Available Keyboard Shortcuts
From the text editor page, click this button to view a list of all the shortcuts available.
10. Notification
Click on this button to view the latest notifications, including the date, row number, id number of each modified string.
11. Chat room
Use this function to interact with other translators
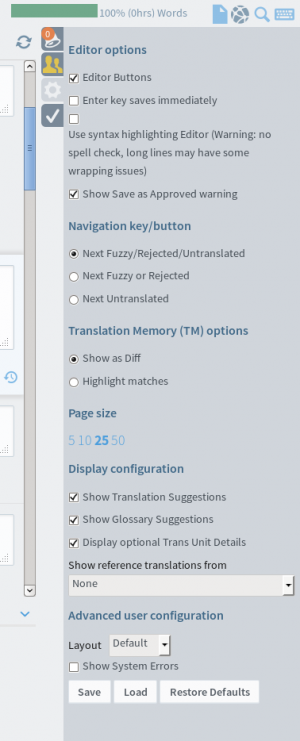
12. Options
This function allows you to modify a few options in order to customize your translating experience. For example, check the “Enter key saves immediately” box to use the Enter key to save strings.
13. Validation options
This page allows you to select different validation options:
- HTML/XML tags: check that html/xml tags are consistence between the source and target text.
- Java variables: check that java style ({x}) variables are consistent.
- Leading/trailing newline (\n): check for consistent leading and trailing newline (\n).
- Positional printf (XSI extension): check that positional printf style (%n$x) variables are consistent.
- Printf variables: check that printf style (%x) variables are consistent.
- Tab characters (\t): check whether source and target have the same number of tabs.
- XML entity reference: check that XML entity are complete.
14. Save as translated
Saving can either be done by clicking on this icon, clicking inside another string or by pressing Ctrl + Enter or the Enter key only (if the box “Enter key saves immediately” is checked in the Editor options (see 10.))
15. Save as fuzzy
You can use this button to set the current string as draft and indicate it needs further work.
16. Cancel
Use this button if you wish to cancel your changes.
17. History
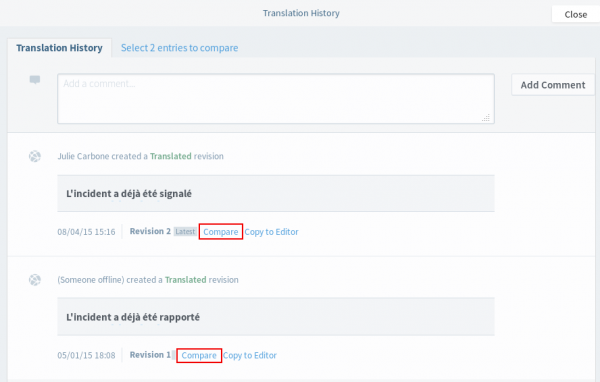
This button takes you to a Translation History page allowing you to:
- leave a comment
- view the history of the translation for this specific string, including modification dates and user names
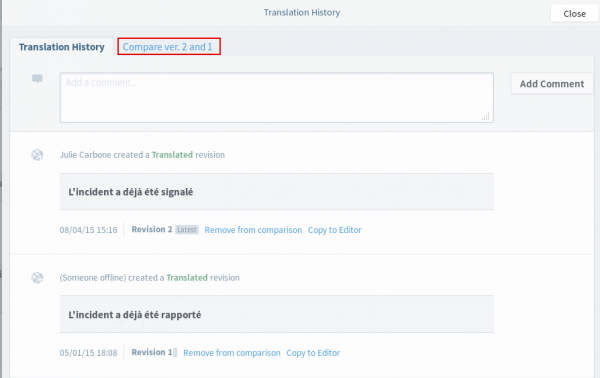
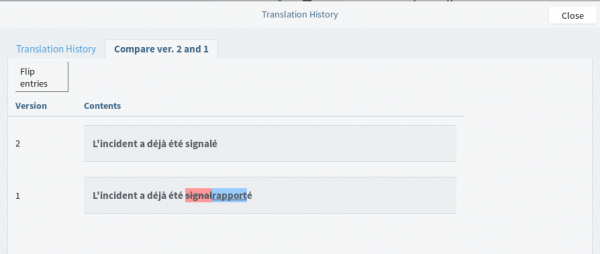
- compare different versions (simply click on “Compare” for the two strings you wish to compare and click on the “Compare vers. X and X” tab to view the comparison.
18. Translation memory
The Translation Memory (TM) is a tool that searches for translations that are equal (100%) or similar (<100%) to the currently selected source string. Matches can be copied to the translation text box and used as-is or modified before saving. To copy TM matches to the selected text box, click the “Copy” button, or use Ctrl+Alt+1 to Ctrl+Alt+4 keyboard shortcuts to copy the first to fourth match in the list. You can also search the TM for other phrases by entering them in the TM text box and clicking “Search”.
19. Glossary
If a glossary has been uploaded for your language, each word in the currently selected row will be searched for a glossary entry.
Translating offline
There are two methods that allow you to translate offline:
Method 1: Zanata-cli
1. Installing zanata-cli
Go to http://zanata.org/help/
Under “Cli” - Select “Installing the client ”
You can install the client in two ways:
- install using DNF for Fedora 22 and later versions or with YUM if you are using older release by running the following command:
sudo dnf install zanata-client
sudo yum install zanata-client
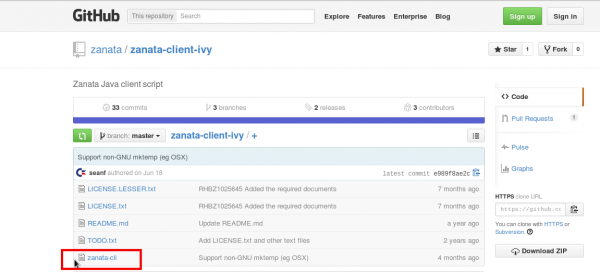
- or install with Ivy:
Click on the “Zanata Ivy Client on github” link
Run the appropriate command depending on the system you use (Fedora, RHEL or other systems)
Once Ivy installed, click the zanata-cli file.
Copy and paste the content of the executable file into your text editor and save as “zanata-cli”.
2. Configuring the client
Configuring the client requires two actions:
2.1 Configuring the user:
Start by creating or opening zanata.ini in ~/.config/ with your preferred text editor.
Two steps:
2.1.1. Creation of an API key
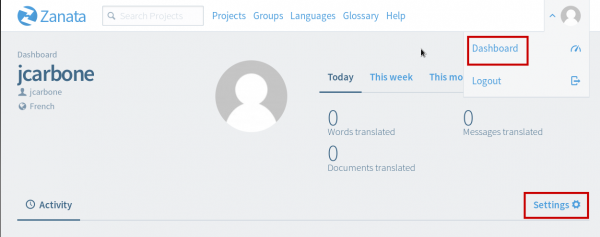
From your Zanata account, go to your dashboard and click “Settings”.
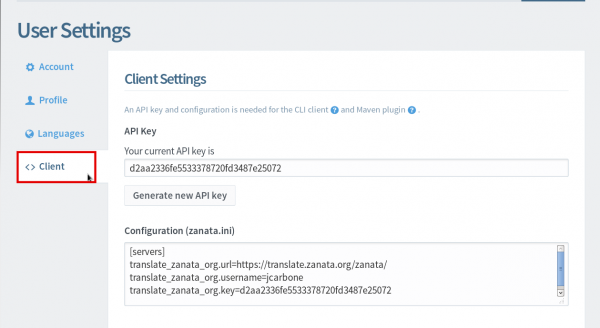
Then select Client
If you do not have one, generate an API key.
2.1.2. Copy the contents of the text-box labeled “Configuration [zanata.ini]” into your previously created zanata.ini file and save the file.
2.2 Configuring the project:
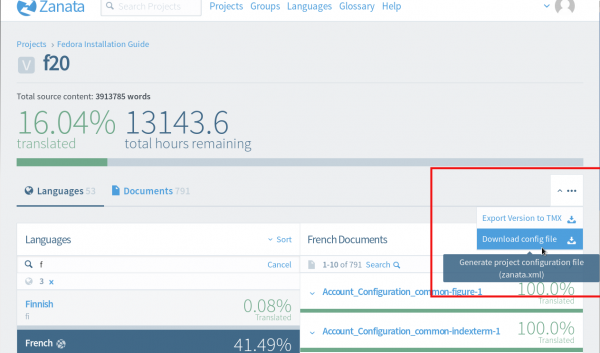
To add project-version configuration to your project directory, navigate to your translation project in Zanata, for example:
Fedora Installation Guide - f20 - select your locale - on the upper right corner, click the arrow and select “Download config file”
Save the zanata.xml file in your preferred location.
3. Downloading the files to your machine
Before running the following command in your command-line, make sure you are in the directory containing the zanata.xml file.
Run:
zanata-cli pull -s src -t trans -l <language code> --pull-type both
The source and translated files will be created into src (source) and trans (translated) files in your directory.
You can now open your files with your preferred translation editor and translate your project.
4. Uploading the files to Zanata
To push the translated files back to Zanata, run the following command:
zanata-cli push -s src -t trans -l <language code> --push-type trans
Your translation has now been pushed back to Zanata and the TM has been updated with your changes.
Method 2: Through the User Interface
Login to https://translate.zanata.org/
Search for your project, for example the Fedora Installation Guide.
Select your language
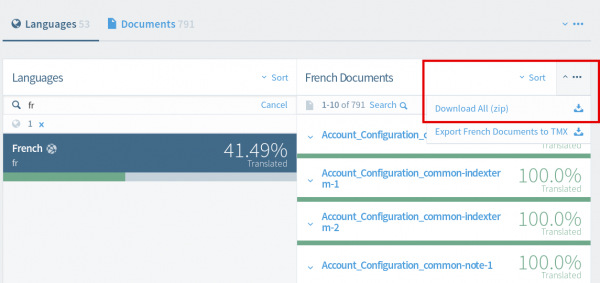
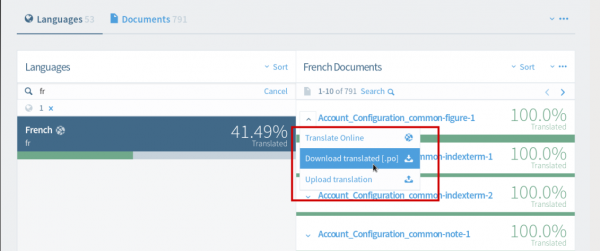
To download the entire project, click on the arrow located in the top right corner of the page (next to "sort") and click "Download All (zip)".
To download one file only, click on the arrow located on the left of the filename, and select "Download Translated [.po]."
Save the file to your preferred location.
Translate the file.
Once finished, upload the file(s) back to Zanata, selecting “Upload translation”.
Note: Although it is possible to download a whole project, the upload is only possible file by file, by clicking the arrow located on the left of the filename, and selecting “Upload translation”.
Proofreading
It is very difficult for translators to find a typo or minor mistake within numbers of translated strings. So proofreading is very important. General speaking, proofreading only refers to the translated strings. However PO file plays a big role through L10n and i18n workflows. So translators should keep the PO file validate during translation process, so other translators and maintainers can use them without any problem.
PO File Validation
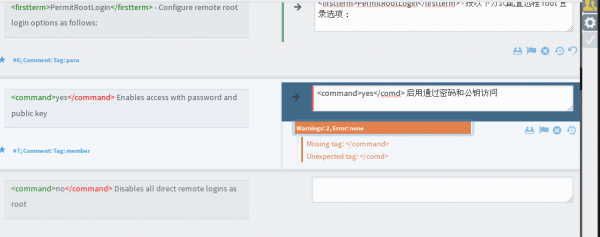
Online translation editor provided by Zanata has a validation feature to check each string. If you prefer translating online, this feature will help you much. The Validation options locates at the right side of the online editor. It provides several validation options for checking.
In this example, ending tag
</command>
is written as
</comd>
, the editor raises warnings, suggests that there exists unexpected tag. When you find warnings like this during online translation, you'd better double check your translation.
If you prefer translating offline, you should always check your file's validity before you submit. The basic command to do this is:
msgfmt -cvo /dev/null po_file_to_check.po
Make sure that there is no error message.
Translation Proofreading
Validation tool is only useful to check the validities of tags, variables or something that is related to coding language. You can't expect it to check your real translated strings.
For example, I mistakenly translated English word "He" to Chinese "它"(The right one is "他"), the validation tool will not warning you that there exists mistake. It's your goal and responsibility to make the translation without mistake.
Read the strings you have translated is a good habit for proofreading.
Testing
In fact, the directory
/usr/share/locale/your_LOCALE/LC_MESSAGES/
is the home of most of the localised files of system components and softwares.
So generally, if you want to the test translation of a software or a system component, the simplest way is:
- Backup the original file first,
sudo cp /usr/share/locale/your_LOCALE/LC_MESSAGES/example.mo /usr/share/locale/your_LOCALE/LC_MESSAGES/example.mo.old
- Put the new mo file into the directory,
sudo msgfmt -o new_example.po /usr/share/locale/your_LOCALE/LC_MESSAGES/new_example.mo
- Run that software/component/command.
(A demo is going to be made in future. An old demo is available here: https://www.youtube.com/watch?v=Hi-7QZrUR3k)
Sections below introduce two more advanced methods for testing.
Using permalinks
One of the benefits of using the Zanata's translation platform, it's the ability to pull a translation from a permalink and then you can install it on your system by using few commands. To obtain a permalink:
- go to translation project
- select the version, if there is more than one
- select the language
- click the Documents(YOUR_LOCALE) link in navigation bar
- copy the permalink (.po) in actions column
Once you have the permalink, you can test the translation on your system by running the following command:
su -c 'mv /usr/share/locale/ca/LC_MESSAGES/anaconda.mo /user/share/locale/ca/LC_MESSAGES/anaconda.mo.old; \
msgfmt <(curl -s https://fedora.zanata.org/rest/file/translation/anaconda/f23-branch/ca/po?docId=po%2Fanaconda &> /dev/stdout)\
 -o /usr/share/locale/ca/LC_MESSAGES/anaconda.mo'
Build a rpm with permalinks and fedpkg
Sometimes, it is not so easy to simple msgfmt the po file and we should build a rpm including the translations to test. There is an example below:
su -c ‘dnf install -y fedpkg fedora-packager rpmdevtools’
fedpkg clone -a -B sssd
cd sssd/f23
su -c 'dnf builddep -y sssd.spec'
fedpkg prep
export version=1.13.0
cp -rp sssd-$version sssd-${version}p
curl -s https://fedora.zanata.org/rest/file/translation/sssd/master/ca/po?docId=po%2Fsssd > sssd-${version}p/po/ca.po
curl -s https://fedora.zanata.org/rest/file/translation/sssd/master/ca/po?docId=src%2Fman%2Fpo%2Fsssd-docs > sssd-${version}p/src/man/po/ca.po
diff -urN sssd-$version sssd-${version}p > my.patch
Edit sssd.spec file for including the patch (1st. Patch999: my.patch at the top; 2nd. %patch999 -p1 in the %prep section, just after %setup -q. The last step -2nd- it's not required if there is a for p in %patches ; do):
...
### Patches ###
Patch9999: my.patch
...

...
%prep
...
%setup -q
%patch9999 -p1
...
Build & install the patched rpm:
fedpkg local
su -c 'dnf install --nogpgcheck */*.rpm'
Credits
The following people contributed to this guide:
- Julie Carbone
- Robert Antoni Buj
- Tian Shixiong
However some of the contents in this guide are referenced from the Fedora Localization Guide for Transifex platform indirectly or directly, so the writers should be thanked here too.

