From Fedora Project Wiki
No edit summary |
No edit summary |
||
| Line 18: | Line 18: | ||
# Press CTRL+D | # Press CTRL+D | ||
|results= | |results= | ||
# After step 1, your terminal should look similar to the following: | # After step 1, your terminal should look similar to the following (version should be 1.0.0 unlike the picture): | ||
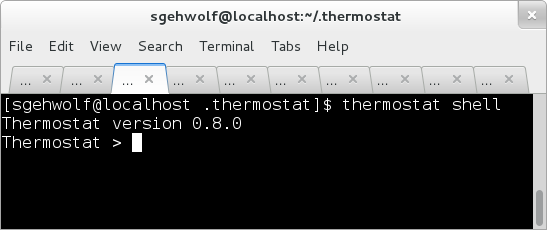
[[Image:ThermostatTestDayShell.png]]. | [[Image:ThermostatTestDayShell.png]]. | ||
# After step 2 available commands should be: | # After step 2 available commands should be: | ||
Revision as of 17:09, 28 November 2013
Description
This test case tests that the thermostat shell works correctly. This command provides a command line shell client for interacting with thermostat.
Setup
- Boot into the machine/VM you wish to test.
- If thermostat is not installed yet, install thermostat.
- Clear storage data:
rm -rf ~/.thermostat/storage/db/* - Start the thermostat storage:
thermostat storage --start
How to test
- Start the thermostat shell:
thermostat shell - At the "Thermostat >" prompt type "help". This should show the list of all available commands. Feel free to use any of these after step 4 (otherwise these would be pretty boring ;-))
- Pressing the cursor up key should bring up the history. In this case "help". Other known shell keyboard shortcuts should work too: e.g. CTRL+L
- Next type "list-vms". You should be asked to provide username and password if you are using thermostat for the first time. In both cases typing return (i.e. empty string) should be sufficient.
- In another terminal, start a thermostat agent:
thermostat agent - At the "Thermostat >" prompt type "list-vms" again.
- connect -d http://127.0.0.1:1234
- disconnect
- connect -d mongodb://127.0.0.1:27518
- Press CTRL+D
Expected Results
- After step 1, your terminal should look similar to the following (version should be 1.0.0 unlike the picture):
- After step 2 available commands should be:
 help                   show help for a given command or help overview
 clean-data             Drop all data related to all of the specified agents
 connect                persistently connect to storage
 disconnect             disconnect from the currently used storage
 dump-heap              trigger a heap dump on the VM
 find-objects           finds objects in a heapdump
 find-root              finds the shortest path from an object to a GC root
 list-heap-dumps        list all heap dumps
 list-vms               lists all currently monitored VMs
 object-info            prints information about an object in a heap dump
 ping                   using the Command Channel, send a ping to a running agent
 save-heap-dump-to-file saves a heap dump to a local file
 show-heap-histogram    show the heap histogram
 validate               validates a thermostat plug-in XML file against the schema
 vm-info                shows basic information about a VM
 vm-stat                show various statistics about a VM
- After step 3 the output should look like:
HOST_ID HOST VM_ID STATUS VM_NAME
- At step 5 the output of list-vms should show some JVMs and should not prompt for username/password.
- At step 6 step thermostat should report that it is already connected to storage. This is because some commands try to automatically connect to some pre-configured storage URL (which may fail in some cases):
Already connected to storage: URL = mongodb://127.0.0.1:27518
Please use disconnect command to disconnect.
- At step 7 no errors/exceptions are expected.
- At step 8 connect should have succeeded this time around
- The last step should exit the shell without errors/exceptions.


