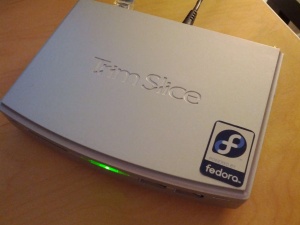
Trimslice
The Trim Slice is a small, fanless, nettop computer in an all metal case, manufactured by CompuLab. It is based on the NVIDIA Tegra 2 processor. It features a variety of connectivity options. At this time there is no support in Fedora for a display on the Trim Slice, so it boots to a serial console.
Technical Specifications
- 1 GHz NVIDA Tegra 2 (dual-core ARM Cortex A9)
- 1 GB DDR2-667 RAM
- HDMI 1.3 max resolution 1920 x 1080
- Gigabit Ethernet (Realtek RTL8111DL)
- 802.11 b/g/n WiFi
For more information on the Trimslice visit their website.
Running Fedora on a Trimslice
This page will give you detailed instructions for running Fedora 18 Beta on your Trimslice. The image is prepared to boot from SD card by default, but can be easily modified to boot from the internal SATA connection (USB) by using the appropriate boot script (boot.scr.usb).
Download the image
The first step is to download the Fedora 18 Beta image. The prebuilt image includes everything you will need and can be written directly to SD Card, USB, or SATA drive.
Download and verify the checksum:
wget http://dl.fedoraproject.org/pub/fedora-secondary/releases/test/18-Beta/Images/armhfp/Fedora-18-Beta-armhfp-Images-CHECKSUM
sha256sum --check Fedora-18-Beta-armhfp-Images-CHECKSUM
Writing the Image
Linux Users
You can write the image to media of your choosing but it does have to meet the minimum size requirement of 4GB. Connect the media to your computer and make note of the drive. To write the image to your media run the following command, changing the drive to the location of your media.
For the SD Image:
xzcat Fedora-18-Beta-trimslice-armhfp.img.xz > /dev/<location-of-your-SD-card>
Once completed run the below command to ensure the entire image is written to the device:
sync
For the SATA/USB Image:
xzcat Fedora-18-Beta-trimslice-armhfp.img.xz > /dev/<location-of-your-SATA/USB>
Then mount the 'boot' partition and copy the appropriate boot script to boot.scr:
cp boot.scr.usb boot.scr
Once completed run the below command to ensure the entire image is written to the device:
sync
Windows Users
- You will need to download Win32 Image Writer as well as a tool to extract the image such as 7-Zip.
- Once downloaded and installed right click on the disk image and select "7-Zip->Extract files here"
- Launch Win 32 Disk Imager and select the extracted disk image and the device you would like to write the files to. Click "Write". Be very careful during this step - all data on the selected drive will be lost!
Using Fedora on the Trimslice
Connect the newly created media to your Trimslice and power on. No further steps are required and your system should boot to a serial console log in prompt. If you do not have a serial cable to connect your Trimslice, you can watch your DHCP server for the newly connected device. After a few minutes you should be able to see the host "fedora-arm'. Use SSH to connect to the root account.
ssh root@fedora-arm (or IP)
The default root password is "fedora". This should be changed immediately.
Release Notes
- This test image includes the updates-testing repository enabled by default.
- Images were composed using tools in Fedora 17 due to continuing work on Fedora 18.
- When using the images on the Pandaboard and Trimslice the system will automatically reboot twice by default for the following:
- repartition the root filesystem on first boot. To prevent this delete the '.rootfs-repartition' flag in '/' or by passing a kernel command line argument of 'nofsresize'.
- The image will automatically be relabeled for SE Linux, this may take some time and will reboot when finished.
Additional Support
There are Fedora ARM users all around the globe - if you need assistance, would like to provide feedback or contribute to Fedora ARM please visit us on the IRC - we can be found in #fedora-arm on Freenode. You can also contact us on the mailing list - arm@lists.fedoraproject.org
