What is Eclipse Fedora Packager?
Eclipse Fedora Packager is a plugin for Eclipse which helps Fedora packagers used to IDEs to package their Fedora RPMs from within Eclipse without needing to resort to the command line.
Eclipse Fedora Packager features include:
- Conveniently clone Fedora Git projects
- RPM-spec-file editor with syntax highlighting, auto-completion and changelog support (<Ctrl>+<Alt>+C keyboard shortcut)
- Download source files, upload new source files
- Prepare local builds (execute %prep section of your spec-file only)
- Create source RPM files based on current spec-file
- Do local builds
- Push build to Koji (the Fedora build system)
- Mock builds
- Push Bodhi updates
- Eclipse Git support (via EGit, please refer to EGit documentation)
Eclipse Fedora Packager is available for Fedora users since F14. Want to try it out? Install it by issuing the following command:
yum install eclipse-fedorapackager
Using Eclipse Fedorapackager
Since release 14 Fedora uses the Git version control system for keeping track of files required for Fedora packaging. See the dist-git documentation for in depth information about dist-git. Fortunately, you don't have to worry about how dist-git works when you are using the Eclipse Fedora Packager plug-in, except for the slightly different approach of doing your packaging work (compared to what you might have been used to when using CVS instead of Git).
Initial Setup
Note that this step is only required once if you are a new Fedora packager or if you are on a new machine, which does not have required FAS certificates installed. If you are sure you are properly set up, you may safely skip this step. How would you set up those certificates for your FAS account?
First, install the fedora-packager RPM package:
yum install fedora-packager
Then, on a terminal run the following command and simply follow the instructions provided:
$ fedora-packager-setup
Once this is done, you are ready to use Eclipse Fedorapackager. Fire up Eclipse. Let's get started. Yay!
Importing a Fedora Git Project
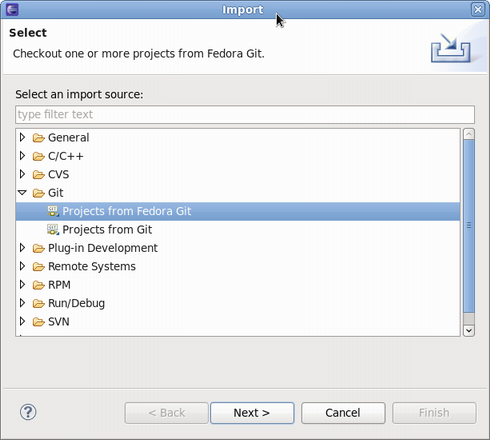
Getting started is easy. Go to "File" => "Import" => "Git" => "Projects from Fedora Git". This will clone the desired Git repository and will create necessary local branches for you. Also for your convenience the "Git Repositories" view will open once the clone process has finished.
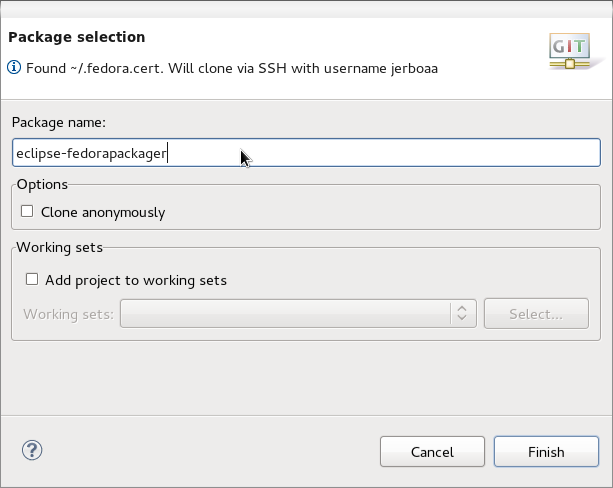
Here's how the Fedora Git import dialog looks like. Next, you specify the package name which will then be prepared for you.
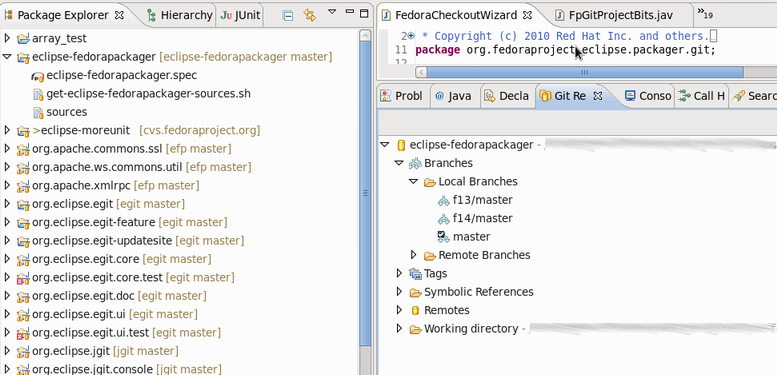
Once the new project has been created you'll see something like the following. Note the branches in the Git Repository view and "[eclipse-fedorapackager master]" right beside the project name. eclipse-fedorapackager in this case refers to the Git repository name and master to the currently checked out branch.
Do Your Fedora Packaging Work
After your Fedora Git project has been created you will find all files required for packaging the desired release (e.g. Fedora 13, which would correspond to branch f13/master. Branch master corresponds to Fedora rawhide, the current development release of Fedora). What follows is a brief description of things you might want to do while packaging up some software. You may choose to do work in a different sequence, but keep in mind that you have to push your locally committed changes to the public repository before you try a Koji build.
Using the Spec-File Editor
Eclipse Fedora Packager uses the RPM Editor and ChangeLog plug-in of the Eclipse Linux Tools project (http://www.eclipse.org/linuxtools). For instance you can easily create a new ChangeLog entry in your spec file by using the <CTRL>+<ALT>+C keyboard shortcut (you may want to set appropriate "ChangeLog" preferences first). Using <CTRL>+<SPACE> auto-completes locally installed packages. Also, you can run rpmlint by right-clicking on your spec file => "Run Rpmlint". For more information have a look at the spec file editor screencast: http://www.eclipse.org/downloads/download.php?file=/technology/linuxtools/videos/specfile-demo.ogg or at the "Specfile Editor User Guide": Help => Help Contents => Specfile Editor User Guide.
Committing Changes to Your Local Git Repository
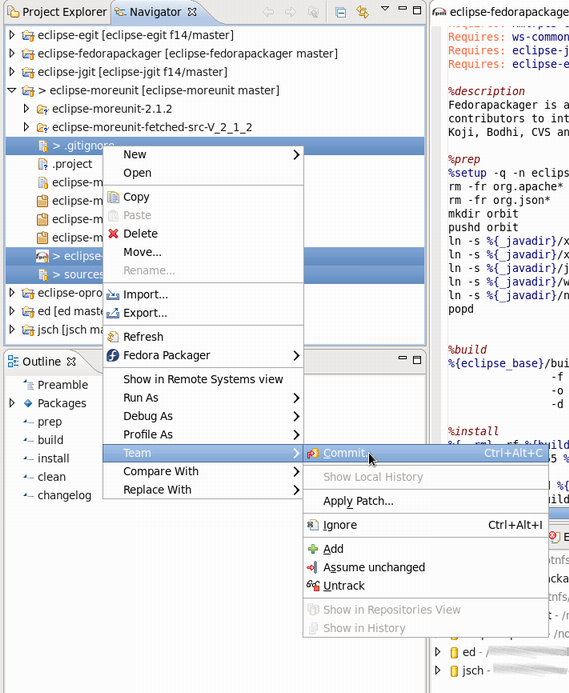
After you've added/changed your spec-file, patches, etc. you want to commit those changes to your repository. You can do so by:
- Selecting the files you want to commit (alternatively select your Fedora Git project and select desired unstaged files when the commit dialog is shown)
- Right-click, "Team" => "Commit..."
Switching Branches (Git Checkout)
Switching branches is as easy as double-clicking on the desired local branch you'd like to work on. The currently checked out branch is indicated to the left of the project name. Please make sure to commit, revert or stash changes before you switch to a different branch. Please refer to the Git/EGit documentation for more information on this.
Make Locally Committed Changes Public (Git Push)
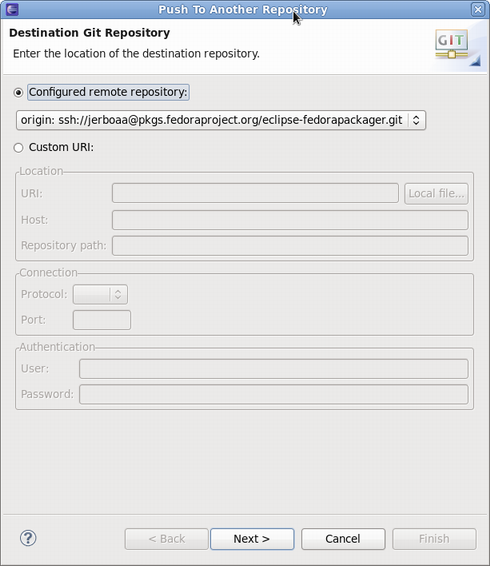
When you are satisfied with your locally committed changes, you are ready to push (or publish) your changes publicly. Remember, Git allows you to rewrite history before you make your changes public. See Git/EGit documentation for more information. Here are the steps required to bring your local repository in synch with origin:
- Select the Fedora Git project
- Right-click, "Team" => "Push..."
- Select the Git repository you want to push to (usually you want to keep this unchanged)
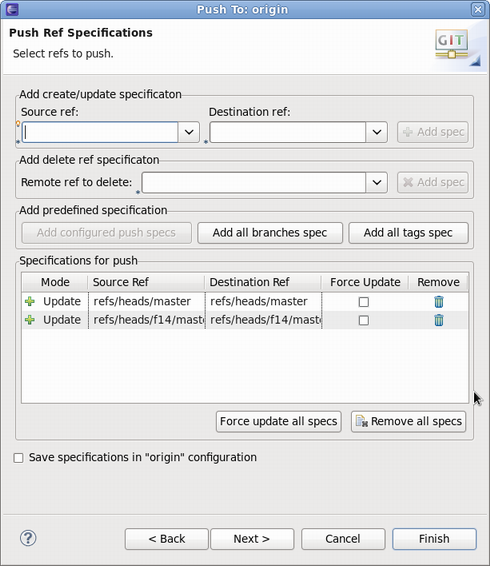
- Select Git references you want to push
- Carry out the push operation
The Git push dialog.
Select the Git references to push. In this example branches master and f14/master will get pushed. Keep in mind that source and destination references are the same for Eclipse Fedora Packager. You may also choose to click the "Add all branches spec" button for convenience, which would push commits to all of your local branches.
Prepare Sources for a Local Build
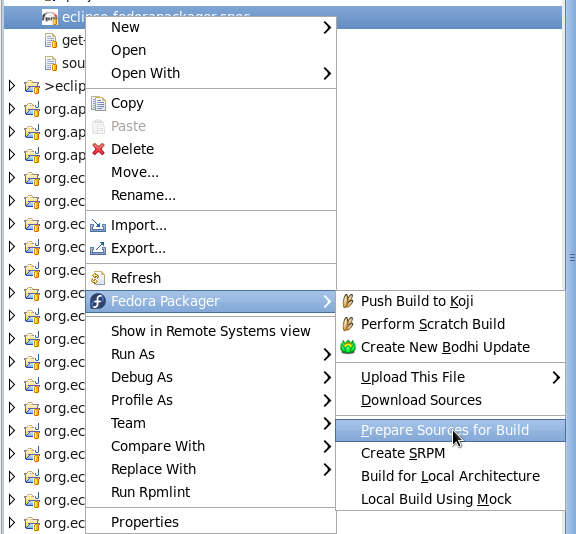
Eclipse Fedora Packager will download and prepare sources right-clicking on the spec-file => "Fedora Packager" => "Prepare Sources for Build"
Build RPM for Your Local Architecture
This is a great way to test if your spec-file actually builds at all. Once you've successfully built your RPM locally, I recommend to further test your spec-file by doing a build in a chroot'ed environment using {{{mock}}}. Both ways are supported by Eclipse Fedorapackager.
You can build your RPM locally by selecting the spec-file => right click => "Fedora Packager" => "Build for Local Architecture". You should see output of the RPM build on your Eclipse console.
Using mock-builds is a great way to test "Requires/BuildRequires" of your spec-file. Select your spec-file => right click => "Fedora Packager" => "Local Build Using Mock". Just be aware that this might take a long time (> 20 minutes) and requires you to have the mock package installed. For convenience, you may want to use Eclipse's "Run in Background" functionality.
Pushing a Build to Koji
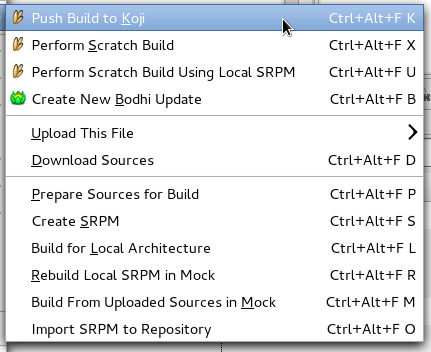
Once you are satisfied with your spec file, make sure to upload sources of your package, commit your changes to your local repository and then push your local changes to the remote repository. When this is done, you can push a build to Koji by right-clicking on your spec file => "Fedora Packager" => "Push Build to Koji".
Eclipse will pop up a message telling you the Koji URL to track your build. Here is an example, how this message might look like:
This should provide you with enough information to track your builds.
Pushing a Bohi Update
After you've successfully built your RPMs, you may use Eclipse Fedorapackager to push an update for those packages. To do so, select the spec file => right click => "Fedora Packager" => "Bodhi Update". You'll be asked to provide similar information as when using the Bodhi Web interface. Once you've successfully created an update, you should see your pushed update on the Bodhi updates website (and you may track the status of updates there).
Feedback/Reporting Bugs
If you think you've found a bug in Eclipse Fedora Packager, please feel free to open a ticket at: https://fedorahosted.org/eclipse-fedorapackager (you have to log in with your FAS username in order to be able to create tickets). Thanks!
Dist-CVS Support (Deprecated)
For historical reasons Eclipse Fedora Packager supports dist-cvs, which has been rendered obsolete by the switch to dist-git with Fedora 14. This documentation has been kept for reference.
Importing a Fedora CVS Project
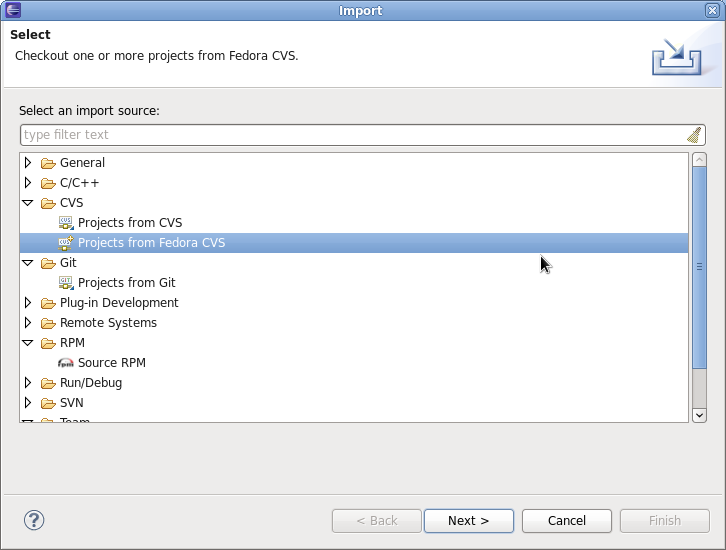
Make sure you have run fedora-packager-setup before you start. This you have to do once on the command line (If you have used fedora-cvs before, this is not necessary). Then, you need to get your Fedora CVS module. Go to "File" => "Import" => "CVS" => "Projects from Fedora CVS"
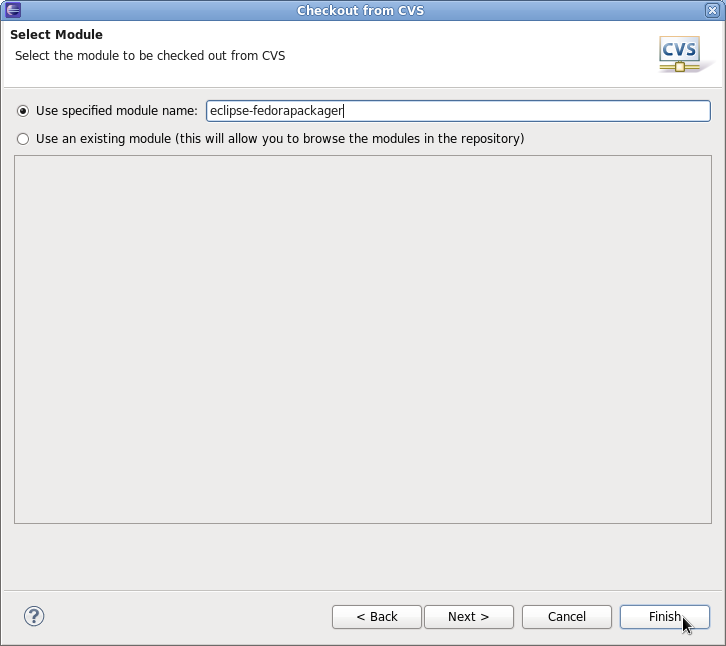
After you hit "Next" twice, you are ready to specify the module you'd like to check out.
After you hit "Finish" you should have a new project in Eclipse named after the Fedora CVS module you just checked out. Note: If you click "Next" at this step, checkout will most likely fail. This is a bug (https://fedorahosted.org/eclipse-fedorapackager/ticket/5) we are currently working on.
See section "Do Your Fedora Packaging Work" for help related to your packaging tasks.

