This document provides instructions to install/remove CUDA 4.2 on Fedora. The final goal will be to be able to run GPU-enabled BOINC applications (in particular, GPUGRID).
Installation
Prerequisites
First, be sure your GPU is compatible with CUDA. Refer to NVidia's list of CUDA GPUs.
Then, install required packages:
su -c 'yum install wget make gcc-c++ freeglut-devel libXi-devel libXmu-devel mesa-libGLU-devel'
Additional prerequisites
If you want to run BOINC projects, you will also need the NVidia drivers and libraries provided by the "rpmfusion" repository.
- See ForbiddenItems#NVIDIA for Fedora's official policy on the NVidia drivers (which is why the "nouveau" graphics driver instead of the "nvidia" one is used by default.)
- See rpmfusion configuration on how to activate the "rpmfusion" repository for your installation.
- See xorg-x11-drv-nvidia on what the "xorg-x11-drv-nvidia" package is about and how to install it.
Note in particular that you need to install the 32 bit and 64 bit "xorg-x11-drv-nvidia" packages if you are on a 64 bit machine otherwise some BOINC projects won't run.
On 32 bit:
su -c 'yum install xorg-x11-drv-nvidia-libs'
On 64 bit:
su -c 'yum install xorg-x11-drv-nvidia-libs xorg-x11-drv-nvidia-libs.i686'
After installation, check the list of provided libraries using "rpm --query --list xorg-x11-drv-nvidia-libs | grep -P '\.so(\.[123])?$'"
/usr/lib64/nvidia/libGL.so.1
/usr/lib64/nvidia/libOpenCL.so.1
/usr/lib64/nvidia/libXvMCNVIDIA.so.1
/usr/lib64/nvidia/libcuda.so
/usr/lib64/nvidia/libcuda.so.1
/usr/lib64/nvidia/libnvcuvid.so.1
/usr/lib64/nvidia/libnvidia-cfg.so.1
/usr/lib64/nvidia/libnvidia-compiler.so.1
/usr/lib64/nvidia/libnvidia-glcore.so
/usr/lib64/nvidia/libnvidia-glcore.so.1
/usr/lib64/nvidia/libnvidia-ml.so.1
/usr/lib64/nvidia/libnvidia-opencl.so.1
/usr/lib64/nvidia/libnvidia-tls.so.1
/usr/lib64/nvidia/tls/libnvidia-tls.so
/usr/lib64/nvidia/tls/libnvidia-tls.so.1
/usr/lib64/vdpau/libvdpau_nvidia.so
/usr/lib64/vdpau/libvdpau_nvidia.so.1
/usr/lib/nvidia/libGL.so.1
/usr/lib/nvidia/libOpenCL.so.1
/usr/lib/nvidia/libXvMCNVIDIA.so.1
/usr/lib/nvidia/libcuda.so
/usr/lib/nvidia/libcuda.so.1
/usr/lib/nvidia/libnvcuvid.so.1
/usr/lib/nvidia/libnvidia-cfg.so.1
/usr/lib/nvidia/libnvidia-compiler.so.1
/usr/lib/nvidia/libnvidia-glcore.so
/usr/lib/nvidia/libnvidia-glcore.so.1
/usr/lib/nvidia/libnvidia-ml.so.1
/usr/lib/nvidia/libnvidia-opencl.so.1
/usr/lib/nvidia/libnvidia-tls.so.1
/usr/lib/nvidia/tls/libnvidia-tls.so
/usr/lib/nvidia/tls/libnvidia-tls.so.1
/usr/lib/vdpau/libvdpau_nvidia.so
/usr/lib/vdpau/libvdpau_nvidia.so.1
Downloads
You will have to download two programs: "CUDA Toolkit" and "GPU Computing SDK". Refer to the NVidia CUDA downloads page for latest versions.
Let's download and save them on the Desktop.
32 bit :
cd ~/Desktop
wget http://developer.download.nvidia.com/compute/cuda/4_2/rel/toolkit/cudatoolkit_4.2.9_linux_32_fedora14.run
wget http://developer.download.nvidia.com/compute/cuda/4_2/rel/sdk/gpucomputingsdk_4.2.9_linux.run
64 bit :
cd ~/Desktop
wget http://developer.download.nvidia.com/compute/cuda/4_2/rel/toolkit/cudatoolkit_4.2.9_linux_64_fedora14.run
wget http://developer.download.nvidia.com/compute/cuda/4_2/rel/sdk/gpucomputingsdk_4.2.9_linux.run
Installation of CUDA Toolkit
Go to "Desktop", add execution permissions of the cudatoolkit downloaded file, and execute it with root permissions:
cd ~/Desktop
chmod +x cudatoolkit_4.2.9_linux_*
su -c './cudatoolkit_4.2.9_linux_*'
When it asks you:
Enter install path (default /usr/local/cuda, '/cuda' will be appended):
type:
/opt
Installation of GPU Computing SDK
As before, go to "Desktop", add execution permissions of the gpucomputingsdk downloaded file, and execute it without root permissions:
cd ~/Desktop
chmod +x gpucomputingsdk_4.2.9_linux.run
./gpucomputingsdk_4.2.9_linux.run
When it asks you:
Enter install path (default ~/NVIDIA_GPU_Computing_SDK):
press [enter] (to use default path)
When it asks you:
Enter CUDA install path (default /usr/local/cuda):
type
/opt/cuda
Preparation
Executable search path
Extend the executable search path to include CUDA executables:
export PATH=$PATH:/opt/cuda/bin
To make this permanent, modify your ~/.bashrc (modifying ~/.bash_profile will cause the path to be extended for the login shell only):
echo 'export PATH=$PATH:/opt/cuda/bin' >> ~/.bashrc
Library search path
Extend the library search path to include CUDA libraries:
export LD_LIBRARY_PATH=$LD_LIBRARY_PATH:/opt/cuda/lib:/opt/cuda/lib64
To make this permanent, modify your ~/.bashrc:
echo 'export LD_LIBRARY_PATH=$LD_LIBRARY_PATH:/opt/cuda/lib:/opt/cuda/lib64' >> ~/.bashrc
Or more correctly, add entries to /etc/ld.so.conf.d/, then run ldconfig once:
su -c 'echo "/opt/cuda/lib" > /etc/ld.so.conf.d/nvidia-cuda.conf; echo "/opt/cuda/lib64" > /etc/ld.so.conf.d/nvidia-cuda64.conf ; ldconfig'
If you later want to check whether any of your programs need something that isn't there, run this command in the relevant directory:
find . -exec file --mime '{}' ';' | grep 'application/x-executable' | cut --fields=1 --delimiter=':' | xargs ldd | grep 'not found'
Compilation
Fedora 16
We finally compile:
32bits:
cd ~/NVIDIA_GPU_Computing_SDK/C
LINKFLAGS=-L/usr/lib/nvidia/ make
64bits:
cd ~/NVIDIA_GPU_Computing_SDK/C
LINKFLAGS=-L/usr/lib64/nvidia/ make
Fedora 17
Some compatibility problems appeared with gcc-4.7. You will have to install a compatibility version:
su -c 'yum install compat-gcc-34 compat-gcc-34-c++'
Create a symbolic link to make CUDA use gcc-3.4:
su -c 'ln -s /usr/bin/gcc34 /opt/cuda/bin/gcc'
Now, you can compile.
32bits:
cd ~/NVIDIA_GPU_Computing_SDK/C
LINKFLAGS=-L/usr/lib/nvidia/ make cuda-install=/opt/cuda
64bits:
cd ~/NVIDIA_GPU_Computing_SDK/C
LINKFLAGS=-L/usr/lib64/nvidia/ make cuda-install=/opt/cuda
Test
Now, let's test if CUDA is working correctly. Type:
~/NVIDIA_GPU_Computing_SDK/C/bin/linux/release/fluidsGL
You should see something like this on the command line:
[fluidsGL] starting...

[fluidsGL] - [OpenGL/CUDA simulation] starting...
   OpenGL device is Available
CUDA device [GeForce GT 610] has 1 Multi-Processors
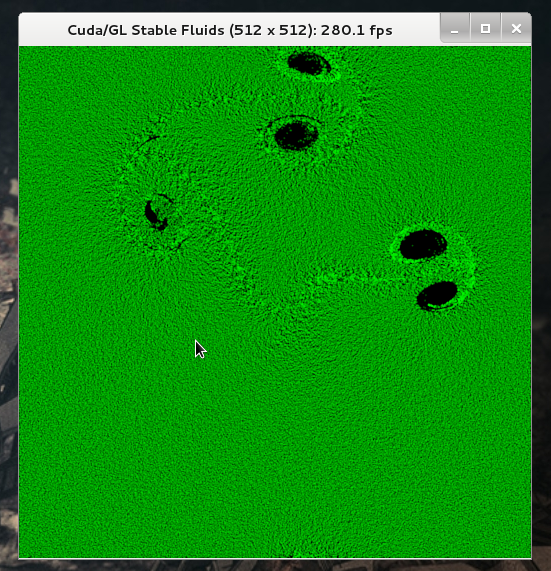
A window with a fluid dynamics simulation should appear. Use the mouse pointer to generate some activity:
Now we can use GPUGRID applications with BOINC.
There are additional test programs underneath ~/NVIDIA_GPU_Computing_SDK/C/bin/linux/release/.
If the following error message appears:
[fluidsGL]
starting...

[fluidsGL] - [OpenGL/CUDA simulation]
starting...
   OpenGL device is NOT Available, [fluidsGL] exiting...
[fluidsGL] test results...
WAIVED
You are probably running the application as a user that does not currently have access to the display.
Cleanup
Now that CUDA has been installed, the installers files are useless. You can remove them:
cd ~/Desktop
rm cudatoolkit_4.2.9_linux_*
rm gpucomputingsdk_4.2.9_linux.run
Uninstallation
If you want to totally remove Cuda, juste delete the /opt/cuda and ~/NVIDIA_GPU_Computing_SDK folders:
rm -r ~/NVIDIA_GPU_Computing_SDK
su -c 'rm -r /opt/cuda'
and remove the export PATH=$PATH:/opt/cuda/bin and export LD_LIBRARY_PATH=$LD_LIBRARY_PATH:/opt/cuda/lib:/opt/cuda/lib64 lines of the ~/.bash_profile file.

