Fedora 17 for ARM
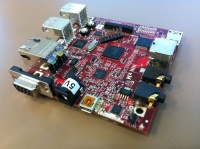
BeagleBoard-xM
A modified version of the popular BeagleBoard, the BeagleBoard-xM is a very small, low powered ARM device designed with open source software development in mind. The Beagleboard-xM is produced by Texas Instruments and Digikey and offers a showcase for TI's OMAP3730 system-on-a-chip(SoC).
Technical Specifications
- TI DM3730 Processor - 1 GHz ARM Cortex-A8 core
- 512 MB LPDDR RAM
- Imagination Technologies PowerVR SGX 2D/3D graphics processor
- DVI-D (HDMI connector chosen for size - maximum resolution is 1400x1050)
- 10/100Mbit/s Ethernet
For more information on the BeagleBoard-xM visit their website.
Running Fedora on a BeagleBoard-xM
This page will give you detailed instructions for running Fedora 17 GA on your BeagleBoard-xM. There are two images to choose from on the BeagleBoard-xM - a HFP(Hard float) or SFP(Soft Float) image, both will boot to a serial console.
Download the image
The first step is to download the Fedora 17 image. The prebuilt images include kernels and can be written directly to an SD Card and booted without any additional steps or configuration. The images require a minimum of 2GB.
Writing the Image
Linux Users
You can write the image to an SD card of your choosing but it does have to meet the minimum size requirements noted above (2GB for the serial image, 4GB for the XFCE Desktop). Connect the SD card to your computer and make note of the drive. To write the image to your SD card run the following command, changing the drive to the location of your SD card.
For the HFP Image:
xzcat Fedora-17-armhfp-beagle-mmcblk0.img.xz > /dev/<location-of-your-SD-card>
For the SFP Image:
xzcat Fedora-17-arm-beagle-mmcblk0.img.xz > /dev/<location-of-your-SD-card>
Once completed run the below command to ensure the entire image is written to the card:
sync
Windows Users
- You will need to download Win32 Image Writer as well as a tool to extract the image such as 7-Zip.
- Once downloaded and installed right click on the disk image and select "7-Zip->Extract files here"
- Launch Win 32 Disk Imager and select the extracted disk image and the SD card you would like to write the files to. Click "Write". Be very careful during this step - all data on the selected drive will be lost!
Mac Users
- Please note that the Default Archive Utility.app will not extract the .xz file. A third party app will have to be used to decompress it. There are multiple options for that
- There is a Free App available in the App Store called Unarchiver.
- If mac homebrew or macport is already installed, then the xz utility can be downloaded and installed using one of those.
- The xz utils .pkg for mac can be downloaded and installed directly from xz utils
- Once the xz utility is installed, open a terminal and make a note of the current drives.
ls /dev/disk?
- Connect the SD card to the mac and make a note of the drive.
- Open Disk Utility and make sure that the card and all the partitions in the card (if any) is unmounted
- In the terminal change to the directory where the .xz file is located
- If xz was installed from the .pkg or macport or homebrew then run the following command
xzcat Fedora-17-armhfp-beagle-mmcblk0.img.xz > /dev/<location-of-the-SD-card>
- If the Unarchiver app from App Store was used then just click and decompress the .xz file and then run the following (may require sudo)
dd if=Fedora-17-armhfp-beagle-mmcblk0.img of=/dev/<location-of-the-SD-card>
- Click and eject the SD card
Using Fedora on the BeagleBoard-xM
Connect the newly created media to your BeagleBoard-xM and power on. No further steps are required and your system should boot to a text based log in prompt. The default root password is "fedoraarm". This should be changed immediately.
Known Issues
- BeagleBoard-xM generates a kernel warning on reboot and requires use of the reset button to actually reboot.
- Yum requires the system time be correct for HTTPS to function. If yum updates are not working check your clock.
- The tar.xz rootfs archives do not preserve SELinux information or file capabilities. If you use these to create your own filesystem image it is recommended that you switch SELinux to use warnings instead of enforcing for first boot, then relabel and reinstall packages that rely upon filesystem capabilities such as glibc-common and ping.
- Images are designed to be written to 2GB (console) or 4GB (xfce) SD cards. On first boot the partition will be resized to the maximum allowable amount. On the second boot the filesystem will be resized to fill the expanded partition. This works for SD cards, SATA Disks, and SSD drives.
- Known release issues
Additional Support
There are Fedora ARM users all around the globe - if you need assistance, would like to provide feedback or contribute to Fedora ARM please visit us on the IRC - we can be found in #fedora-arm[?] on Freenode. You can also contact us on the mailing list - arm
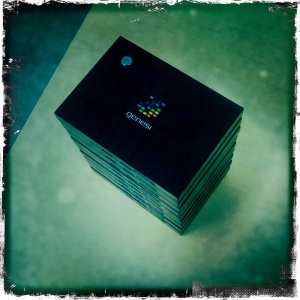
EFIKA MX Smarttop
The EFIKA MX Smarttop is a network computer based around the EFIKA MX micro-motherboard and requires no more than 5W to fully operate. At this time there is no support for a display and the Smarttop boots to a serial console.
Technical Specifications
- Freescale i.MX515 (ARM Cortex-A8 800MHz)
- 512MB RAM
- WXGA(1280×768) display support (HDMI)
- 10/100Mbit/s Ethernet
- 802.11 b/g/n WiFi
For more information on the EFIKA MX Smarttop visit their website.
Running Fedora on a EFIKA MX Smarttop
This page will give you detailed instructions for running Fedora 17 GA on your EFIKA MX Smarttop. The image is suitable for writing to a minimum of 2GB SD card and boots to a serial console.
Download the image
The first step is to download the Fedora 17 image. The prebuilt images include kernels and can be written directly to an SD Card and booted without any additional steps or configuration. The image requires a minimum of 2GB and boots to a serial console.
Writing the Image
Linux Users
You can write the image to an SD Card of your choosing but it does have to meet the minimum size requirement of 2GB. Connect the SD Card to your computer and make note of the drive. To write the image to your media run the following command, changing the drive to the location of your SD Card.
For the SD Image:
Fedora-17-armhfp-mx51-mmcblk0.img.xz> /dev/<location-of-your-SD-Card>
Once completed run the below command to ensure the entire image is written to the device:
sync
Windows Users
- You will need to download Win32 Image Writer as well as a tool to extract the image such as 7-Zip.
- Once downloaded and installed right click on the disk image and select "7-Zip->Extract files here"
- Launch Win 32 Disk Imager and select the extracted disk image and the device you would like to write the files to. Click "Write". Be very careful during this step - all data on the selected drive will be lost!
Mac Users
- Please note that the Default Archive Utility.app will not extract the .xz file. A third party app will have to be used to decompress it. There are multiple options for that
- There is a Free App available in the App Store called Unarchiver.
- If mac homebrew or macport is already installed, then the xz utility can be downloaded and installed using one of those.
- The xz utils .pkg for mac can be downloaded and installed directly from xz utils
- Once the xz utility is installed, open a terminal and make a note of the current drives.
ls /dev/disk?
- Connect the SD card to the mac and make a note of the drive.
- Open Disk Utility and make sure that the card and all the partitions in the card (if any) is unmounted
- In the terminal change to the directory where the .xz file is located
- If xz was installed from the .pkg or macport or homebrew then run the following command
xzcat Fedora-17-armhfp-mx51-mmcblk0.img.xz > /dev/<location-of-the-SD-card>
- If the Unarchiver app from App Store was used then just click and decompress the .xz file and then run the following (may require sudo)
dd if=Fedora-17-armhfp-mx51-mmcblk0.img.xz of=/dev/<location-of-the-SD-card>
- Click and eject the SD card
Using Fedora on the EFIKA MX Smarttop
Connect the newly created media to your EFIKA MX Smarttop and power on. No further steps are required and your system should boot to a serial console log in prompt. If you do not have a serial cable to connect your Smarttop, you can watch your DHCP server for the newly connected device. After a few minutes you should be able to see the host "fedora-arm'. Use SSH to connect to the root account.
ssh root@fedora-arm (or IP)
The default root password is "fedoraarm". This should be changed immediately.
Known Issues
- Yum requires the system time be correct for HTTPS to function. If yum updates are not working check your clock.
- Genesi Efika MX SmartTop generates a kernel warning on reboot and requires use of the reset button to actually reboot.
- The tar.xz rootfs archives do not preserve SELinux information or file capabilities. If you use these to create your own filesystem image it is recommended that you switch SELinux to use warnings instead of enforcing for first boot, then relabel and reinstall packages that rely upon filesystem capabilities such as glibc-common and ping.
- Images are designed to be written to a minimum of 2GB SD cards. On first boot the partition will be resized to the maximum allowable amount. On the second boot the filesystem will be resized to fill the expanded partition. This works for SD cards, SATA Disks, and SSD drives.
- Known release issues
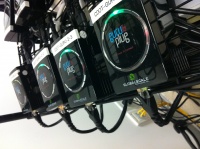
Kirkwood Series
Kirkwood processors were developed for network connected consumer electronic equipment that are used in gateway/access point, set-top boxes, network storage, digital home media servers, point of services terminal, and plug computers (sheevaplug, dreamplug, guruplug, etc).[1]
Plug Computers
A plug computer is a small form factor server, intended to provide network-based services within the home. These ARM based devices provides always-on, always-connected, and environmentally-friendly computing that is readily available for developers.[2]
GuruPlugs
The Guruplugs are one of the popular plug computers. More information on Guruplugs can be found here. Below is the technical specifications for a typical GuruPlug Server Plus
Technical Specifications
- 1.0 Ghz - 1.2 Ghz Processor (Marvell 88F6281)
- 512 MB 16-bit DDR2 RAM
- 512 MB NAND Flash
- 802.11 b/g WiFi
- SATA 2.0 port (eSATA)
- 2 x Gigabit Ethernet
- 2 x 16550 compatible UART interfaces (external JTAG adapter)
- 2 x USB 2.0 ports
- 1 x MicroSD Slot
Running Fedora on a Kirkwood Device
This page will give a user detailed instructions for running Fedora 17 GA on a Kirkwood based device. The F17 GA image provides a user with a minimal text based installation to a serial console. At the moment there is no GUI image available. F17 GA image has been tested to run on GuruPlug Server Plus using microSD card.
Downloading the image
The first step is to download the Fedora 17 image. The prebuilt images include kernels and can be written directly to an storage medium such as an (micro)SD Card or an USB stick and requires additional steps (uboot configurations) to boot. The serial console image requires a minimum storage medium size of 2GB.
Writing the Image
Please be aware that writing the image to any drive (SD/microSD/USB/Hard Drive) will erase any existing data in that drive. Please make sure that the card is not write protected.
Linux Users
The image can be written to any storage device as long as it meets the minimum size requirements noted above (2GB for the serial image)
- Connect the device or card to a computer and make a note of the device file in /dev.
- To write the image to to the device run the following command (Please adjust the path in /dev)
xzcat Fedora-17-arm-kirkwood-mmcblk0.img.xz > /dev/<location-of-storage-device>
- Once completed run the command below to ensure the entire image is written to the storage
sync
Windows Users
- Download Win32 Image Writer as well as a tool to extract the image such as 7-Zip.
- Once downloaded and installed right click on the disk image and select "7-Zip->Extract files here"
- Launch Win 32 Disk Imager and select the extracted disk image and the microSD card to write the files to. Click "Write". Be very careful during this step - all data on the selected drive will be lost!
Mac Users
- Please note that the Default Archive Utility.app will not extract the .xz file. A third party app will have to be used to decompress it. There are multiple options for that
- There is a Free App available in the App Store called Unarchiver.
- If mac homebrew or macport is already installed, then the xz utility can be downloaded and installed using one of those.
- The xz utils .pkg for mac can be downloaded and installed directly from xz utils
- Once the xz utility is installed, open a terminal and make a note of the current drives.
ls /dev/disk?
- Connect the microSD card to the mac and make a note of the drive.
- Open Disk Utility and make sure that the card and all the partitions in the card (if any) is unmounted
- In the terminal change to the directory where the .xz file is located
- If xz was installed from the .pkg or macport or homebrew then run the following command
xzcat Fedora-17-arm-kirkwood-mmcblk0.img.xz > /dev/<location-of-the-microSD-card>
- If the Unarchiver app from App Store was used then just click and decompress the .xz file and then run the following (may require sudo)
dd if=Fedora-17-arm-kirkwood-mmcblk0.img of=/dev/<location-of-the-microSD-card>
- Click and eject the microSD card
Booting the Image
Connect the newly created media to the ARM device and power on. Depending on the model/version of the plug/uboot, additional uboot parameters may be necessary or the existing ones could be edited. To do that, stop the boot process during the countdown and follow the instructions here.
Fedora 17 kirkwood images contain a FAT32 (vfat) filesystem on the first partition, and this can be read by the U-Boot bootloader installed on various Plugs. Fedora 18 kirkwood images currently contain an ext3 filesystem that cannot be read by many of these devices. On Fedora versions prior to 18, the following has been tested with a GuruPlug Server Plus (remove the "saveenv" command prior to "boot" if you would only like to test without permanently changing configuration):
# NOTE: substitute "usb 1:1" with "usb 0:1" on non-Plus model devices
# NOTE: On Fedora 18 "uInitrd" replaces "uInitrd-kirkwood"
# NOTE: On Fedora 18 "uImage" replaes "uImage-kirkwood"

printenv
set bootargs 'console=ttyS0,115200 root=LABEL=rootfs rootwait'
set loadInitrd 'fatload usb 1:1 0x7400000 uInitrd-kirkwood'
set loadImage 'fatload usb 1:1 0x6400000 uImage-kirkwood'
set bootcmd 'usb start; ${loadImage}; ${loadInitrd} ; bootm 0x6400000 0x7400000'
saveenv
boot
Fedora 18 (beta) kirkwood images contain an ext3 filesystem that cannot be booted directly by certain plugs (such as the GuruPlug) at this time. You can install the kernel and initrd directly into the Plug's NAND flash using commands similar to the following:
# NOTE: substitute "usb 1:1" with "usb 0:1" on non-Plus model devices

usb start
fatload usb 1:1 0x6400000 /uImage
nand erase 0x100000 0x400000
nand write.e 0x6400000 0x100000 0x400000
fatload usb 1:1 0x6400000 /uInitrd
nand erase 0x500000 0x1b00000
nand write.e 0x6400000 0x500000 0x1b00000
set bootargs 'console=ttyS0,115200 root=LABEL=rootfs rootwait'
set loadInitrd 'nand read.e 0x7400000 0x500000 0x1b00000'
set loadImage 'nand read.e 0x6400000 0x100000 0x400000'
set bootcmd 'nand start; ${loadImage}; ${loadInitrd} ; bootm 0x6400000
0x7400000'
saveenv
boot
You can also boot the device directly from some USB sticks by recreating the "boot" filesystem as a vfat partition:
# mount the boot filesystem on the USB stick
cp -ax /var/run/media/user/boot kirkwood_boot
# unmount the USB stick but do not eject
sudo mkfs.vfat -n boot /dev/sdc # replace "sdc" with device name
# mount the USB stick
sudo cp -ax kirkwood_boot /var/run/media/user/boot
# umount the USB stick
The Fedora 17 instructions will then work as shown above.
Using Fedora on the Kirkwood Device
At this point no further steps should require and the system should boot to a text based log in prompt (serial image). The default root password is "fedoraarm". This should be changed immediately.
Known Issues
- Some images have ntpdate failed during boot, but expected running inside firewall. The following command can be applied to address the issue
service ntpd stop
ntpdate <LocalNTPServer>
- Yum requires the system time be correct for HTTPS to function. If yum updates are not working check the clock.
- The tar.xz rootfs archives do not preserve SELinux information or file capabilities. When creating custom filesystem image, it is recommended that switching SELinux to use warnings instead of enforcing for first boot, then relabel and reinstall packages that rely upon filesystem capabilities such as glibc-common and ping.
- Images are designed to be written to 2GB (console) or 4GB (xfce) SD cards. On first boot the partition will be resized to the maximum allowable amount. On the second boot the filesystem will be resized to fill the expanded partition. This works for SD cards, SATA Disks, and SSD drives.
- Known release issues
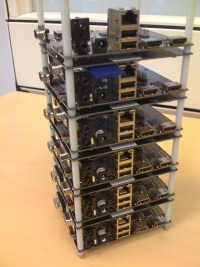
Pandaboard
The Pandaboard is one of the most popular ARM devices available and provides users with either a desktop environment or minimal installation (text based).
Technical Specifications
- 1 GHz Dual core Cortex A9 Processor (OMAP 4430-4460)
- 1 GB DDR2 RAM
- HDMI v1.3
- 10/100Mbit/s Ethernet
- 802.11 b/g/n WiFi
For more information on the Pandaboard visit their website.
Running Fedora on a Pandaboard
This page will give you detailed instructions for running Fedora 17 GA on your Pandaboard. There are two images to choose from on the Pandaboard - with the XFCE desktop, the other providing a serial console (text based).
Download the image
The first step is to download the Fedora 17 image. The prebuilt images include kernels and can be written directly to an SD Card and booted without any additional steps or configuration. The serial console image requires a minimum of 2GB and the XFCE desktop requires a minimum of 4 GB.
Writing the Image
Linux Users
You can write the image to an SD card of your choosing but it does have to meet the minimum size requirements noted above (2GB for the serial image, 4GB for the XFCE Desktop). Connect the SD card to your computer and make note of the drive. To write the image to your SD card run the following command, changing the drive to the location of your SD card.
For the Serial Image:
xzcat Fedora-17-armhfp-panda-mmcblk0.img.xz > /dev/<location-of-your-SD-card>
For the XFCE Desktop:
xzcat Fedora-17-armhfp-panda-xfce-mmcblk0.img.xz > /dev/<location-of-your-SD-card>
Once completed run the below command to ensure the entire image is written to the card:
sync
Windows Users
- You will need to download Win32 Image Writer as well as a tool to extract the image such as 7-Zip.
- Once downloaded and installed right click on the disk image and select "7-Zip->Extract files here"
- Launch Win 32 Disk Imager and select the extracted disk image and the SD card you would like to write the files to. Click "Write". Be very careful during this step - all data on the selected drive will be lost!
Mac Users
- Please note that the Default Archive Utility.app will not extract the .xz file. A third party app will have to be used to decompress it. There are multiple options for that
- There is a Free App available in the App Store called Unarchiver.
- If mac homebrew or macport is already installed, then the xz utility can be downloaded and installed using one of those.
- The xz utils .pkg for mac can be downloaded and installed directly from xz utils
- Once the xz utility is installed, open a terminal and make a note of the current drives.
ls /dev/disk?
- Connect the SD card to the mac and make a note of the drive.
- Open Disk Utility and make sure that the card and all the partitions in the card (if any) is unmounted
- In the terminal change to the directory where the .xz file is located
- If xz was installed from the .pkg or macport or homebrew then run the following command
xzcat Fedora-17-armhfp-panda-xfce-mmcblk0.img.xz > /dev/<location-of-the-SD-card>
- If the Unarchiver app from App Store was used then just click and decompress the .xz file and then run the following (may require sudo)
dd if=Fedora-17-armhfp-panda-xfce-mmcblk0.img of=/dev/<location-of-the-SD-card>
- Click and eject the SD card
Using Fedora on the Pandaboard
Connect the newly created media to your Pandaboard and power on. No further steps are required and your system should boot to a text based log in prompt (serial image) or to a graphical log in (XFCE Desktop image). The default root password is "fedoraarm". This should be changed immediately.
Known Issues
- Yum requires the system time be correct for HTTPS to function. If yum updates are not working check your clock.
- The tar.xz rootfs archives do not preserve SELinux information or file capabilities. If you use these to create your own filesystem image it is recommended that you switch SELinux to use warnings instead of enforcing for first boot, then relabel and reinstall packages that rely upon filesystem capabilities such as glibc-common and ping.
- Images are designed to be written to 2GB (console) or 4GB (xfce) SD cards. On first boot the partition will be resized to the maximum allowable amount. On the second boot the filesystem will be resized to fill the expanded partition. This works for SD cards, SATA Disks, and SSD drives.
- The XFCE Desktop image uses the HDMI port for display, which will work as a dvi-d also.
- The powerVR gpu is currently not available in the omapdrm driver used in Fedora kernel-omap.
- Each time the panda boots a new random MAC address is generated. This is because there is no EEPROM to store the mac address. To have the same eth0 MAC address after reboot the /etc/sysconfig/network-scripts/ifcfg-eth0 file needs to have MACADDR= line added.
- Known release issues
Extra Info
The image file can be loop mounted.
- Inflate the archive:
unxz Fedora-17-armhfp-panda-xfce-mmcblk0.img.xz
- Print the partition table:
fdisk -l Fedora-17-armhfp-panda-xfce-mmcblk0.img

Disk Fedora-17-armhfp-panda-xfce-mmcblk0.img: 3775 MB, 3775922176 bytes
255 heads, 63 sectors/track, 459 cylinders, total 7374848 sectors
Units = sectors of 1 * 512 = 512 bytes
Sector size (logical/physical): 512 bytes / 512 bytes
I/O size (minimum/optimal): 512 bytes / 512 bytes
Disk identifier: 0x00000000

                                  Device Boot      Start         End      Blocks   Id  System
Fedora-17-armhfp-panda-xfce-mmcblk0.img1   *          63     1044224      522081    c  W95 FAT32 (LBA)
Fedora-17-armhfp-panda-xfce-mmcblk0.img2         1044225     7374847     3165311+  83  Linux
- The /boot partition starts at sector 63, where each sectore is 512 bytes.
mount -o loop,offset=$(( 63 * 512 )) Fedora-17-armhfp-panda-xfce-mmcblk0.img /mnt/boot
- The rootfs partition starts are sector 1,044,225
mount -o loop,offset=$(( 1044255 * 512 )) Fedora-17-armhfp-panda-xfce-mmcblk0.img /mnt/rootfs
At this point you may customize the image however you wish.
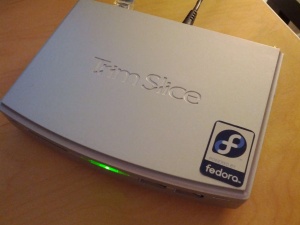
Trimslice
The Trimslice is one of the most powerful ARM devices available and features a variety of connectivity options. At this time there is no support for a display and the Trimslice boots to a serial console.
Technical Specifications
- 1 GHz NVIDA Tegra 2 (dual-core ARM Cortex A9)
- 1 GB DDR2-667 RAM
- HDMI 1.3 max resolution 1920 x 1080
- Gigabit Ethernet (Realtek RTL8111DL)
- 802.11 b/g/n WiFi
For more information on the Trimslice visit their website.
Running Fedora on a Trimslice
This page will give you detailed instructions for running Fedora 17 GA on your Trimslice. There are two images to choose from on the Trimslice please choose the appropriate image for your target media - SD card or SATA/USB drive.
Download the image
The first step is to download the Fedora 17 image. The prebuilt images include kernels and can be written directly to SD Card, USB, or SATA drive and booted without any additional steps or configuration. Both images require a minimum of 2GB and boots to a serial console.
Writing the Image
Linux Users
You can write the image to media of your choosing but it does have to meet the minimum size requirement of 2GB. Connect the media to your computer and make note of the drive. To write the image to your media run the following command, changing the drive to the location of your media.
For the SD Image:
xzcat Fedora-17-armhfp-trimslice-mmcblk0.img.xz> /dev/<location-of-your-SD-card>
For the SATA/USB Image:
xzcat Fedora-17-armhfp-trimslice-sda.img.xz > /dev/<location-of-your-SATA/USB>
Once completed run the below command to ensure the entire image is written to the device:
sync
Windows Users
- You will need to download Win32 Image Writer as well as a tool to extract the image such as 7-Zip.
- Once downloaded and installed right click on the disk image and select "7-Zip->Extract files here"
- Launch Win 32 Disk Imager and select the extracted disk image and the device you would like to write the files to. Click "Write". Be very careful during this step - all data on the selected drive will be lost!
Mac Users
- Please note that the Default Archive Utility.app will not extract the .xz file. A third party app will have to be used to decompress it. There are multiple options for that
- There is a Free App available in the App Store called Unarchiver.
- If mac homebrew or macport is already installed, then the xz utility can be downloaded and installed using one of those.
- The xz utils .pkg for mac can be downloaded and installed directly from xz utils
- Once the xz utility is installed, open a terminal and make a note of the current drives.
ls /dev/disk?
- Connect the SD card to the mac and make a note of the drive.
- Open Disk Utility and make sure that the card and all the partitions in the card (if any) is unmounted
- In the terminal change to the directory where the .xz file is located
- If xz was installed from the .pkg or macport or homebrew then run the following command
xzcat Fedora-17-armhfp-trimslice-mmcblk0.img.xz > /dev/<location-of-the-SD-card>
- If the Unarchiver app from App Store was used then just click and decompress the .xz file and then run the following (may require sudo)
dd if=Fedora-17-armhfp-trimslice-mmcblk0.img.xz of=/dev/<location-of-the-SD-card>
- Click and eject the SD card
Using Fedora on the Trimslice
Connect the newly created media to your Trimslice and power on. No further steps are required and your system should boot to a serial console log in prompt. If you do not have a serial cable to connect your Trimslice, you can watch your DHCP server for the newly connected device. After a few minutes you should be able to see the host "fedora-arm'. Use SSH to connect to the root account.
ssh root@fedora-arm (or IP)
The default root password is "fedoraarm". This should be changed immediately.
Known Issues
- Yum requires the system time be correct for HTTPS to function. If yum updates are not working check your clock.
- The tar.xz rootfs archives do not preserve SELinux information or file capabilities. If you use these to create your own filesystem image it is recommended that you switch SELinux to use warnings instead of enforcing for first boot, then relabel and reinstall packages that rely upon filesystem capabilities such as glibc-common and ping.
- Images are designed to be written to a minimum of 2GB SD cards, SATA Disks, and SSD drives. On first boot the partition will be resized to the maximum allowable amount. On the second boot the filesystem will be resized to fill the expanded partition. This works for SD cards, SATA Disks, and SSD drives.
- Known release issues
Upgrading to the 3.7 Kernel
In order to upgrade to the 3.7 kernel is Fedora 17 you will need to first make some manual changes to your configuration.
- Change the load address for the initramfs (uInitrd) to accommodate larger kernels.
- Boot up the Trimslice and install the 3.7 kernel from updates. Do not reboot the system until you make the following changes.
yum update kernel-tegra
- Change to the boot directory and use your favorite editor to edit '/boot/armhfp-trimslice-sda-<mmc/usb>-boot.cmd.(Note you will need to choose the appropriate file depending on your boot device, mmc or usb).
setenv bootargs console=${console} root=LABEL=rootfs ro rootwait
ext2load usb 0:1 4880000 uInitrd-tegra
ext2load usb 0:1 4080000 uImage-tegra
ext2load usb 0:1 5880000 dtbs/tegra20-trimslice.dtb
bootm 4080000 4880000 5880000
- Regenerate the boot script by running the following command:
mkimage -A arm -O linux -T script -C none -d armhfp-trimslice-sda-usb-boot.cmd armhfp-trimslice-sda-usb-boot.scr
- Copy the boot script to be used on the next boot:
cp armhfp-trimslice-sda-usb-boot.scr boot.scr
- A Trimslice Device Tree Binary (.dtb) available here tegra20-trimslice.dtb.
mkdir -p /boot/dtbs
cd /boot/dtbs
wget http://ausil.us/dtb/3.7/tegra20-trimslice.dtb
- Shutdown the system.
- Upgrade to a new version of U-Boot (U-Boot 2012.04.01-1.01). Follow the instructions on the Trimslice Wiki.
- Once completed, your system will now boot to the 3.7 kernel.

