Introduction
So, you've somehow acquired the Fedora Usability Lab. Perhaps you've volunteered to run some usability tests at an event or show, or perhaps you got a group of friends together to test out some software you've been working on in Fedora. Great! But, what next?
- First, let's review what equipment the Fedora Usability lab will provide you.
- After that, we'll review what equipment you'll need to supplement the kit with in order to run a successful usability test.
- Finally, we'll walk through how to assemble the usability lab.
By the time you follow the steps in this document, you'll have configured all the equipment you need to run a usability test.
What's In the Usability Lab?
The Fedora Usability Lab comes in a big black box. The box it comes in is a hard-sided Opteka equipment case with foam padding on the inside to protect the parts. The box is 13" x 18" x 7", and it has a shoulder strap and briefcase-style carrying handle.
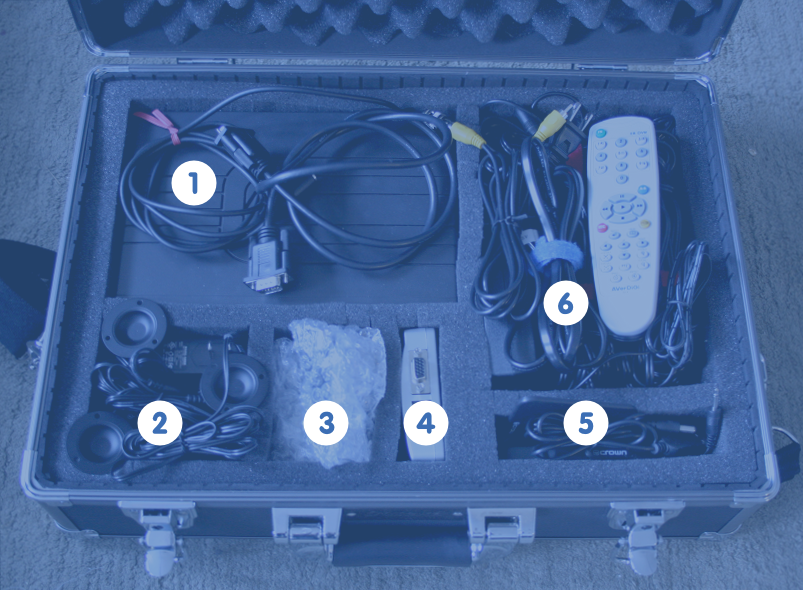
Go ahead and open up the box. There are six compartments inside the usability lab box. You'll see them labeled below. Let's review the equipment in each compartment.
Compartment 1: DVR + mic wire, monitor cable
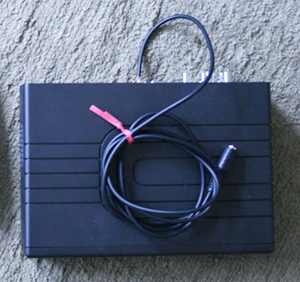
DVR + mic wire
The DVR is the central unit that mixes video from the 3 cameras and from the test computer (via the scan converter) and records them into video files. It also mixes the audio. The mic wire attached to the unit is used for connecting the microphone.
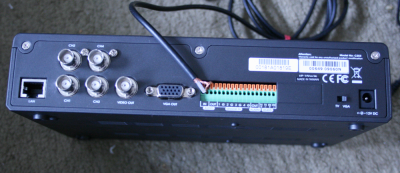
By the way, here's what the back of the DVR looks like (click to zoom):
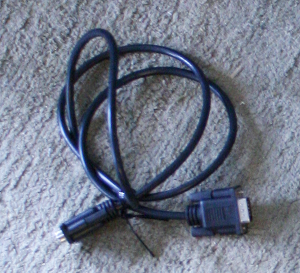
Monitor Cable
The monitor cable included in this kit is intended for you to connect the computer you are running the usability test on to the scan converter box. This will enable the DVR to record video of what is happening on-screen as the user runs through a usability test. Since the video of the screen is recorded externally, your usability testers will not experience any lag or delay on the system due to recording.
The monitor cable will connect to the video out monitor port of a computer on one end, and the video in port on the narrow end of the scan converter on the other end. Typically we use laptops or netbooks for testing. Remember that the Fedora Usability Lab does not come with a computer for testing on - you will have to provide this.
Compartment 2: 3 camera power supplies, 3 camera stands
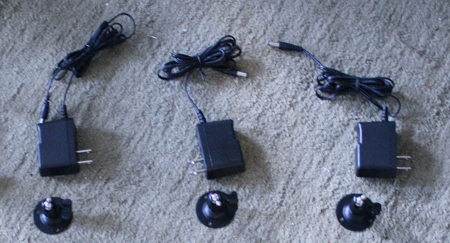
3 Camera power supplies and 3 camera stands
You'll see the three camera power supplies in the top row of the photo above, the three circular metal camera stands in the bottom row. The power supplies plug into the end of the cables coming out of the cameras. The cameras turn on as soon as they are plugged into these power supplies and the power supplies are plugged into a power source.
The circular metal camera stands screw into a small screw hole on the end of each camera cylinder, opposite the lens. The camera stands have a screw that allows you to adjust then tighten the angle the camera points out. Note that the camera stands are light and typically require a book or some other weight to hold them down. Yes, this is annoying. :)
Compartment 3: 3 cameras
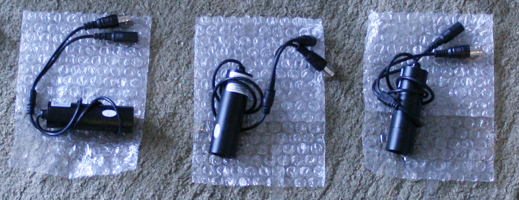
Three Cameras
Each camera comes with a bubblewrap pouch to keep them protected when stored. They are packed into the case rolled up in the bubble wrap pouch. When you unpack the lab, please be sure not to lose the bubblewrap camera pouches.
The cameras are cylindrical, with a lens at one end and a wire and screwhole for a stand on the other end. So you are able to set the cameras up in order to take an upright image, the top of the camera has been marked with white markings. (One has a line, two have silly faces. :) )
Why three cameras? Here's some sample camera configurations you may want to try that use three cameras:
Usability test involving external hardware
If you're running a usability test that involves the user plugging in a camera, MP3 player, USB key, printer, or other external hardware:
- Camera One: User's face
- Camera Two: Point one camera towards the port the user will be working with so it's clear to video watchers when the user is doing this and how they do it
- Camera Three: Keyboard & mouse, so observers can note when the user switches modalities.
Usability test serving as an example of how to run a usability test
- Camera One: User's face
- Camera Two: Keyboard & mouse, so observers can note when the user switches modalities.
- Camera Three: Tester, so video watchers can take note of what the tester is doing as they run the test.
Usability test involving hardware without a video out port
You may need to run a usability test that involves hardware without a video out port, for example a phone, mp3 player, tablet, etc.:
- Camera One: User's face
- Camera Two: User's hands holding the device (so you can observe how the user interacts with its form factor)
- Camera Thee: Screen of the device
Compartment 4: Scan converter
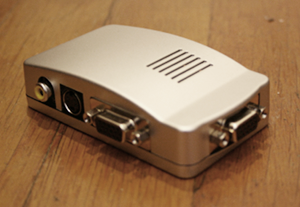
Scan Converter
The scan converter essentially takes a video signal from the computer you're testing on, and feeds that signal into the DVR so it can be recorded. Note in the photo above that the scan converter has two monitor cable ports. You will not be using the one on the longer side (to the left in the picture.) That's an output port. Rather, you'll be using the monitor port on the right side of the photo (input port), on the narrow end of the scan converter box.
The scan converter has a max input resolution of 1024x768 pixels.
Compartment 5: Microphone, microphone plate, and scan converter power cable
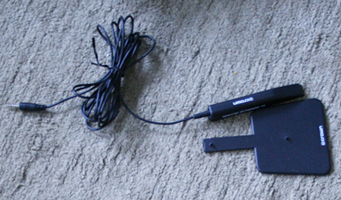
Microphone and microphone plate
The microphone is the narrow, almost cylindrical part with a wire coming out of it. The microphone plate is the wide plate with two pegs on it. When you unpack these parts, you should snap the flat bottom of the microphone into the plate. When putting it away, pull them apart gently for packing.
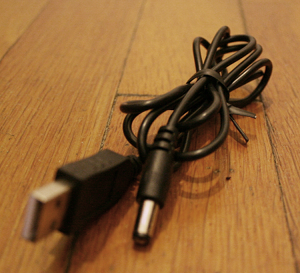
Scan converter power cable
What's great about the scan converter in this lab is that it's not yet another thing that needs to be plugged in. The scan converter powers off of USB. So you can plug it into a USB port of the machine you're running the usability tests on.
Compartment 6: Camera cables, scan converter video cable, DVR power supply, DVR remote
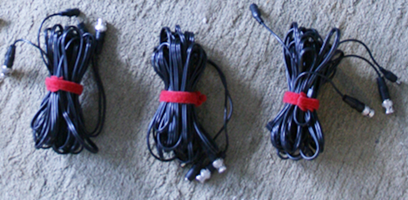
Camera cables
These camera cables have two plugs coming out either end, a total of four plugs per cable. Each end has one power plug and one BNC video plug. You'll want to plug one end's BNC plug into a camera, and the other end into the DVR. You won't need the power part of the plug - the power supplies for the camera can plug straight into the camera.
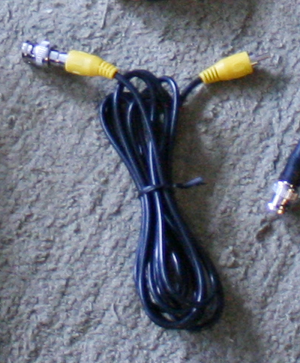
Scan converter video cable
This is the video output cable for the scan converter. One end goes into the yellow RCA out jack of the scan converter; the other end has a BNC converter attached and goes into the DVR. (Typically channel 1 of the DVR.)
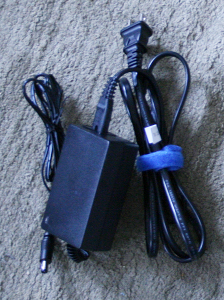
DVR power supply
This is the power supply for the DVR. As soon as you plug it into the DVR and a power source, the DVR turns on. There's no power button on the DVR.
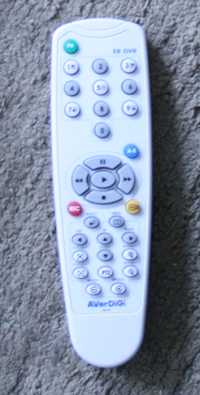
DVR remote
The DVR remote is necessary to start and stop recording, as well as to copy files off of the hard disk and to clean the hard disk after you've copied your files off.
Full Set Of Parts
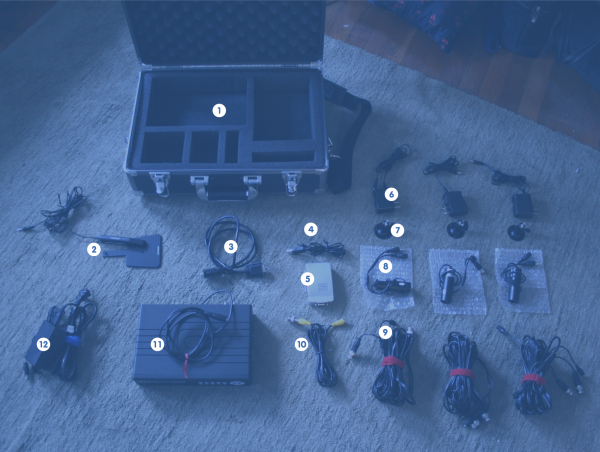
Okay, so let's review now. Here's a diagram with the full set of parts labeled:
- Carrying case
- Microphone and microphone plate
- D-SUB connector video cable (for scan converter)
- Scan converter USB power cable
- Scan converter box
- Camera AC power supplies (3)
- Camera stands (3)
- Cameras (3)
- Camera BNC & power cables (3)
- Video cable for scan converter (RCA / BNC)
- DVR / video mixer
- DVR power supply
Additional Equipment Needed
In addition to the parts included in the Fedora Usability Lab outlined above, you'll need a few extra things to be able to set up the lab:
- A power strip - you'll need at least 6 outlets to run the lab:
- Three outlets for the cameras (one per camera)
- One outlet for the DVR
- One outlet for the computer you'll be testing on
- One outlet for an external display (attached to the DVR)
- A computer to test on. We recommend a laptop or a netbook. Make sure whichever computer you choose to use, that it has a monitor out port that uses a D-SUB connector (it's the most common type of connector used in nonitor out ports.) If it does not have this, you'll be unable to record the screen through the scan converter. It should output no more than 1024x768 pixels - my laptop is 1400x1050 natively and is able to output 1024x768 fine.
- An external display to connect to the DVR. This is so you can view the menus on the DVR and preview the camera output to make sure you've got your cameras properly connected and aimed. The DVR has a monitor output D-SUB connector on the back; we've successfully used it with both standard and widescreen LCD monitors as well as two different types of projectors.
- A USB key, ideally 4 GB or more to transfer videos off of the DVR unit. I've found about half my USB keys end up working with it. I'm trying to find a spare I can add to the kit permanently.
How to assemble the lab
Coming soon!


